
In the previous post, we made easter crafts like baskets, eggs, decors, etc for kids. Now we have tried new ideas for adults as well as kids to celebrate Easter in 2025.
Easter is great, and everyone enjoys it with their full effort and fun. They make new crafts and many more things. So, use your crafting ability to try these ideas and learn new things! You just need some essential materials and some innovation to make this. So get all your stationery and craft materials and let’s begin the work.
After all, you can use these crafty materials as gifts for your friends and kids. So have a look at them and start making them.
Contents
- Craft Ideas to Celebrate Easter 2025
- You may like these:
- Simple and Distinctive Craft Projects Suitable for All Skill Levels
- Do-It-Yourself Craft Ideas Designed for Teenagers
- Innovative Craft Projects for Classroom Activities with Children
- Educational DIY Crafts and Activities for Kids to Learn Through Play
- New Year’s Eve Craft Projects and Activities Designed for Toddlers
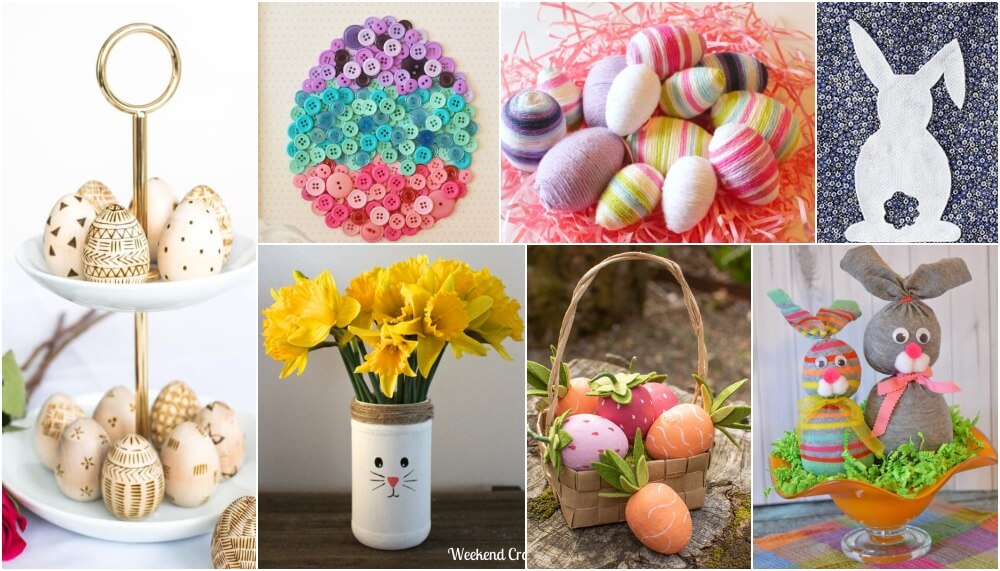
Craft Ideas to Celebrate Easter 2025
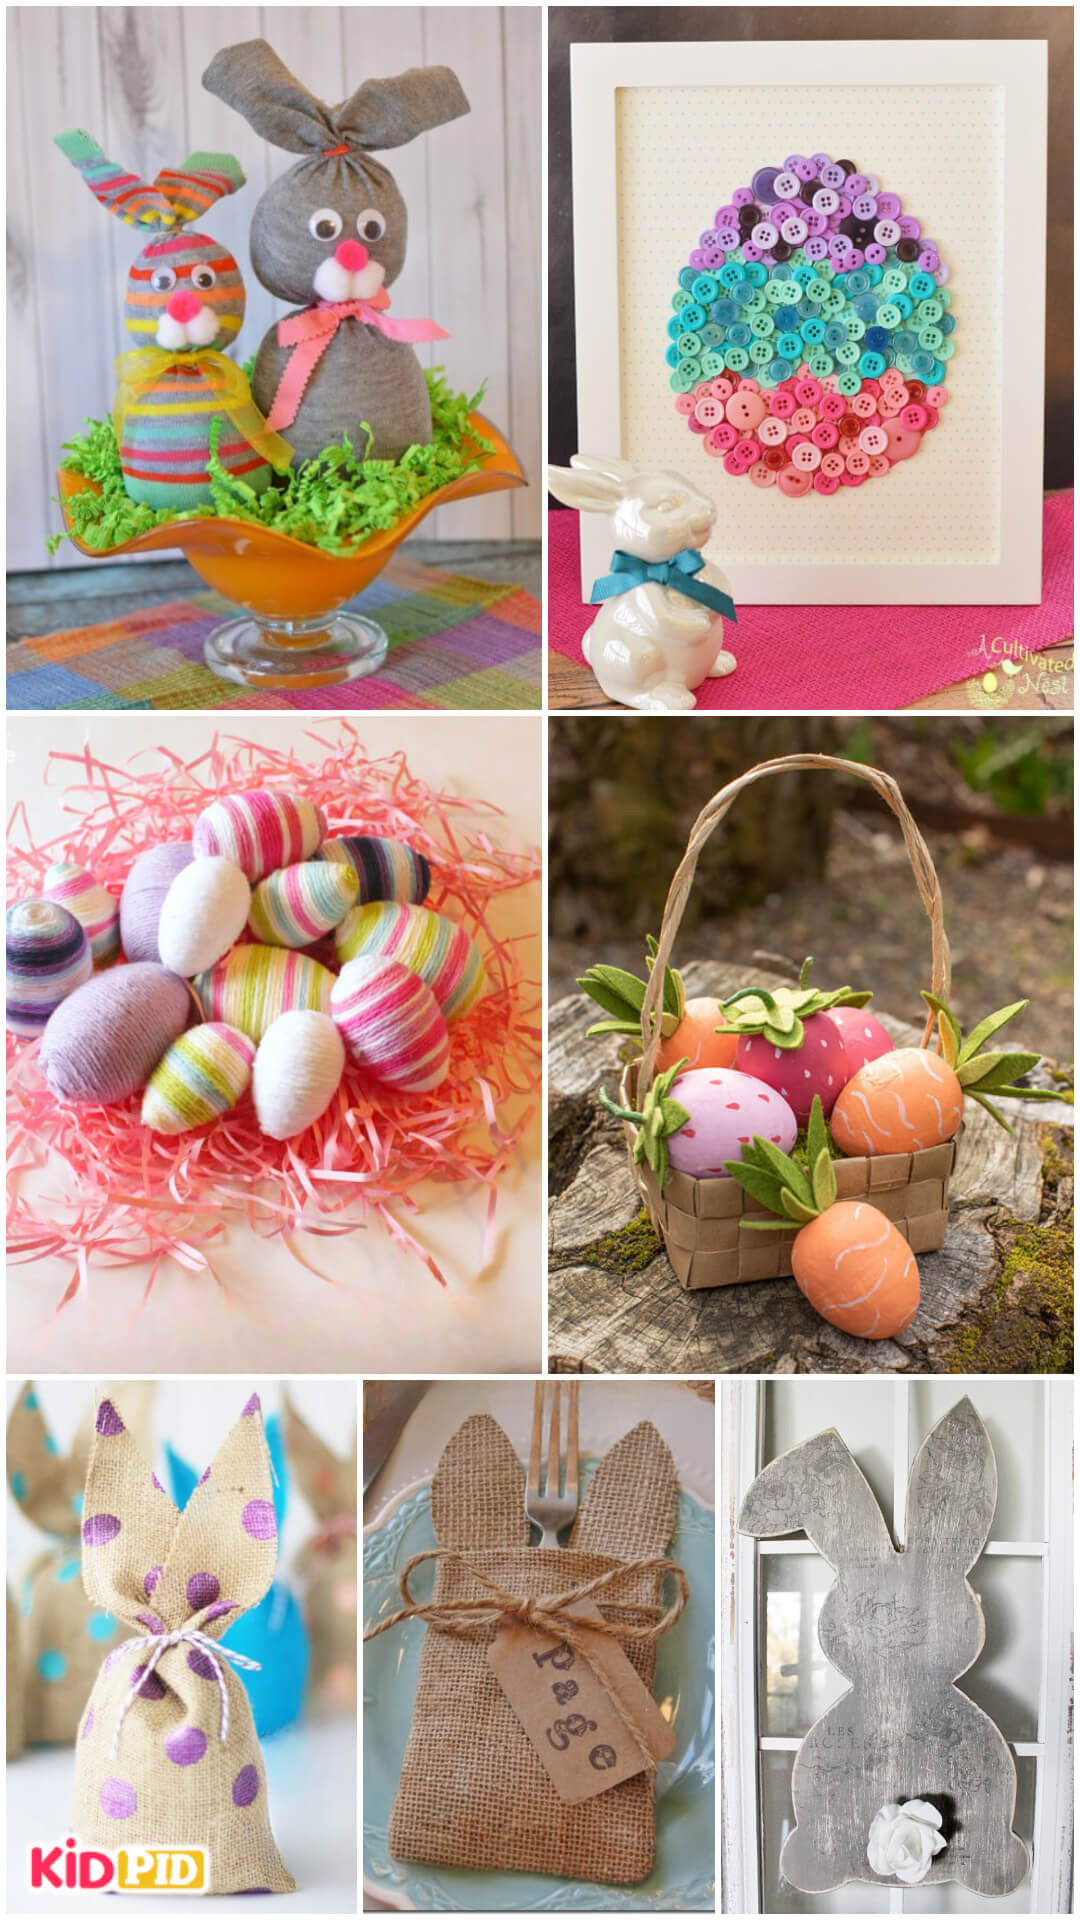
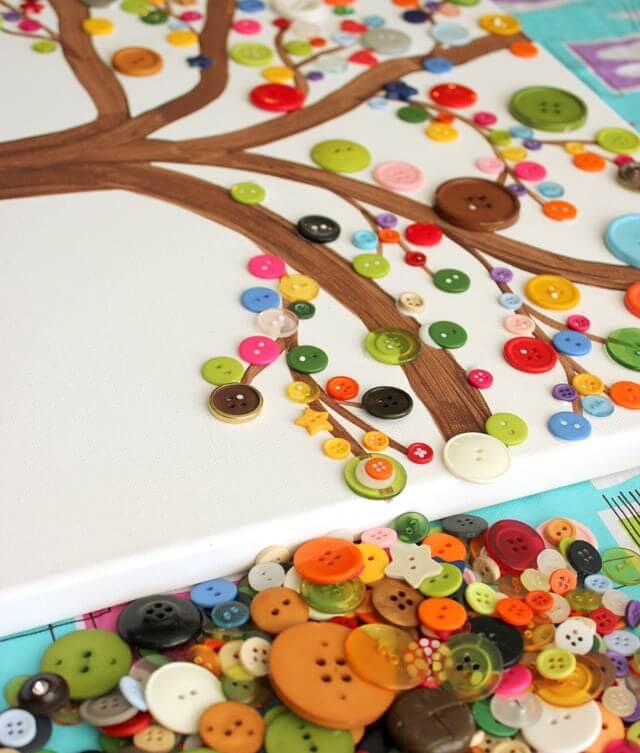
DIY Button Craft
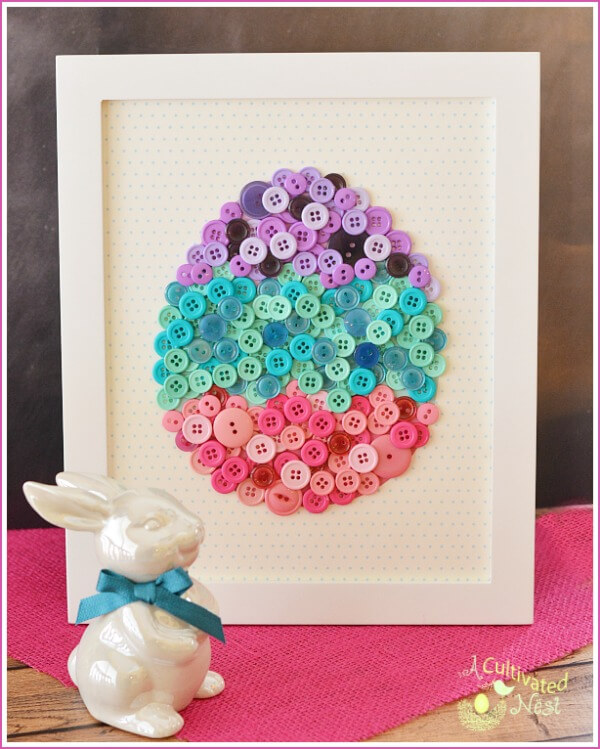
Image Source/Tutorial: A Cultivated Nest
Easter season is ahead! It is one of the decorative ideas for this occasion. You can try it. It is a simple craft using buttons and arranging them in a perfect egg-shaped manner. Have a look at the instructions.
Materials required:
- A-frame
- Different colored buttons
- Glue gun
- Old toothbrush
Procedure:
- Make an egg(according to the size of the frame) on white paper and cut it out.
- Glue the buttons on it. Start with the outline and then come to the center.
- Use the old toothbrush to remove extra glue from the buttons.
- Place your egg in the frame.
Your decorative creation is ready!
DIY Bunny Vase
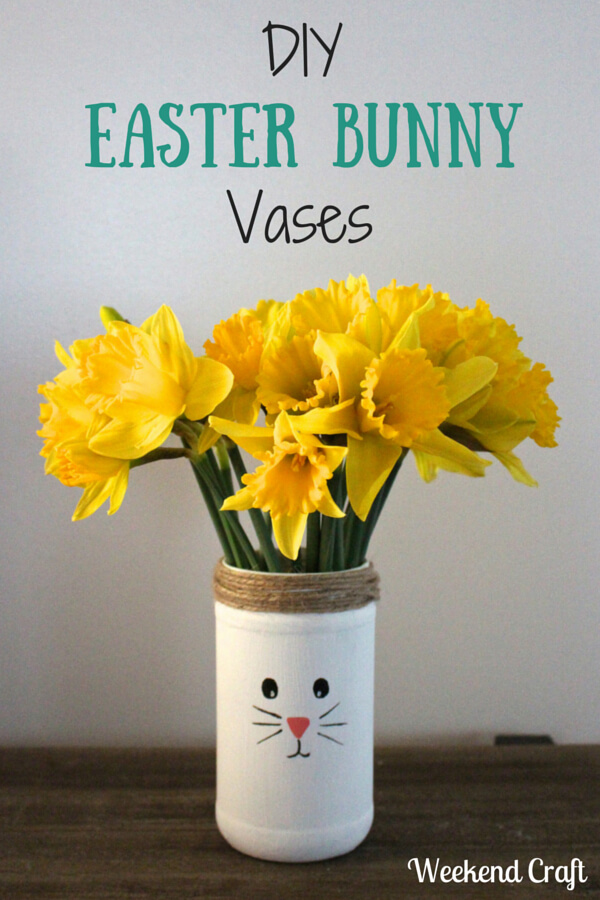
Image Source/Tutorial: Weekend Craft
Use your old jar to make the vase for your beautiful flowers. It is the best way of reusing old materials. Just paint it and decorate your vase. You will be amazed to see it after its completion.
Materials required:
- Old glass jar
- Chalk paint
- Baking soda and vinegar
- Toothbrush
Procedure:
- Take the glass jar and remove all the stickers, if any!
- Make a paste of baking soda and vinegar for the base of the painting.
- Using your toothbrush spread the paste on the jar thoroughly.
- Now it’s time to paint. Use the chalk paint as it easily dries.
- Use black and red paint to make whiskers and the nose of a bunny on the jar. Also, draw the eyes and mouth.
- Let it dry! Your vase is ready!
- Place your beautiful flowers in the vase and decorate them in your room.
DIY Easter Bunny Soap
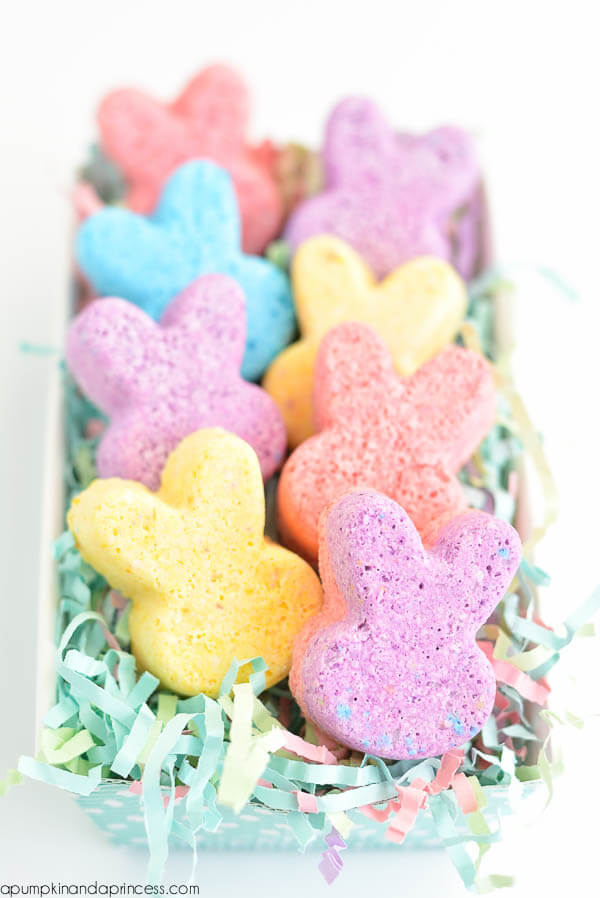
Image Source/Tutorial: A Pumpkin and a Princess
On every easter occasion, we get confused that what should we make different things for our kids. We have tried for Easter baskets and eggs. Now we will try to make easter soaps for our baskets. Children will love them.
Materials required:
- Soap base
- Bunny mold
- Orange essential oil
- Soap colorant
Procedure:
- Take the soap base and cut them into cubes and place them in a large microwavable bowl.
- Mix it in essential oil and soap colorant.
- Put the soap into the mold and let it dry.
- Your beautiful easter soaps are ready!
DIY Sugar Scrub
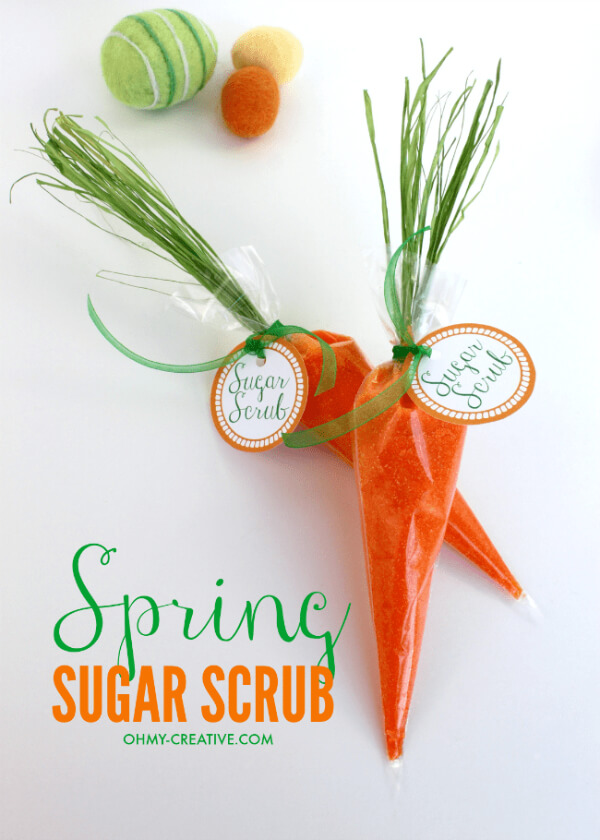
Image Source/Tutorial: Oh My! Creative
It is a homemade scrub. This can be a perfect gift for your kids on the occasion of Easter. It can be used as a gift in baby showers and on other occasions too. So, for making this see the procedure.
Materials required:
- Essential oils
- Orange icing color
- 1/2 cup olive oil
- Green ribbon
- One cup sugar
- Cello bags
Procedure:
- Pour the food coloring into the water to make it dilute.
- In a bowl, mix 1/4 of olive oil and sugar. Then add food coloring to it.
- Pour approximately eight drops of essential oil.
- Cut the strips from the raffia to make the stem of the carrot.
- Put the sugar scrub in a cello bag(in a cone shape) and insert the raffia strips in it.
- Tie it with a ribbon.
Your super cute carrot scrub is ready!
Strawberry Easter Eggs
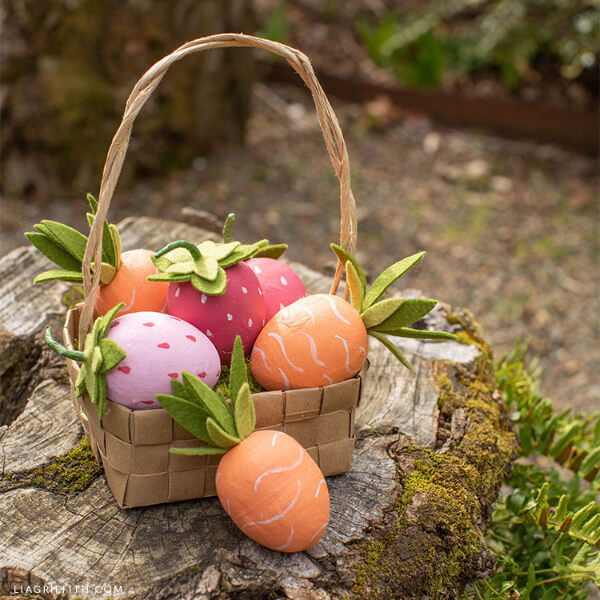
Image Source/Tutorial: Lia Griffith
If you are confused about the materials put them in your easter basket. Here is an idea! You can make fruity eggs to decorate your basket. Give attention to the procedure for guidance.
Materials required:
- Acrylic paints
- Felt
- Spun cotton eggs
- Paintbrush
- Hot glue gun
- Scissor
Procedure:
- Take the eggs and paint them. Each egg should be painted with one color.
- Then add designs according to the fruit you want to make, using a small paintbrush.
- Cut the leaves of fruits or toppers from the green felt sheet and attach them to the top of the eggs. Note that they should be in a vertical position. Use a hot glue gun for this.
- Paste at least 5-6 leaves on each egg.
- Let them dry. Then put all the eggs in a basket to decorate it.
Sock Easter Bunny
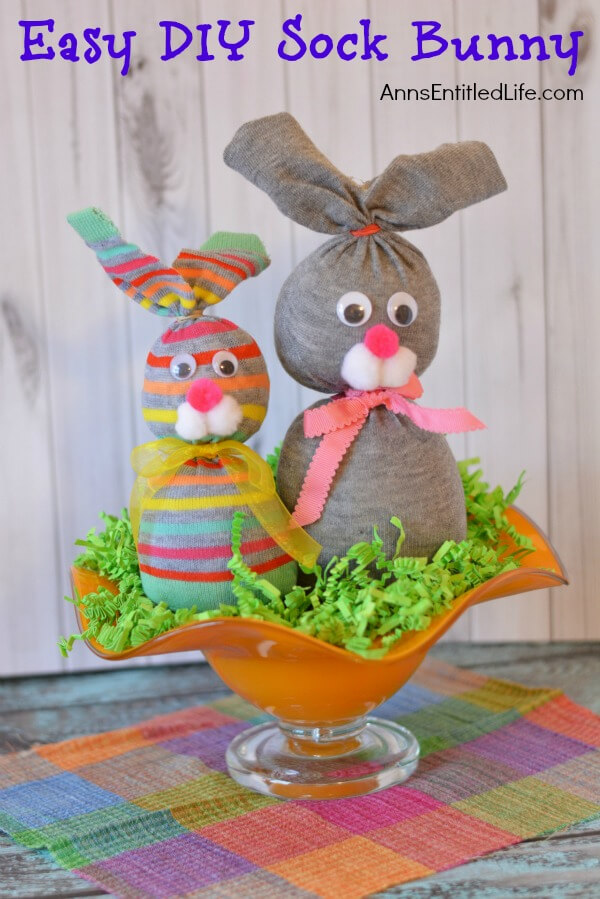
Image Source/Tutorial: Ann’s Entitled Life
Use your old socks to make a crafty easter. It is a bunny made using old socks and some decorative materials. You can try this for your kids. Believe me, they will enjoy this a lot with this craft.
Materials required:
- Old socks
- Rice
- Ribbons
- Googly eyes
- Glue gun
- Pom poms
- Rubber bands
- Easter grass
- Scissor
Procedure:
- Take the sock and fill the rice in it according to the size of the bunny you want.
- Place a rubber band on the top and another band in the middle of the sock to make the head and belly separate.
- Now, stick the googly eyes on your face.
- Take the pom poms to make the nose and mouth. I used pink pom-pom for the nose and white for the mouth.
- Tie a ribbon on the neck to make them beautiful.
- Finally, cut the remaining portion of the sock left on the top to give it a shape.
- It looks so adorable! Isn’t it?
Bunny Banner
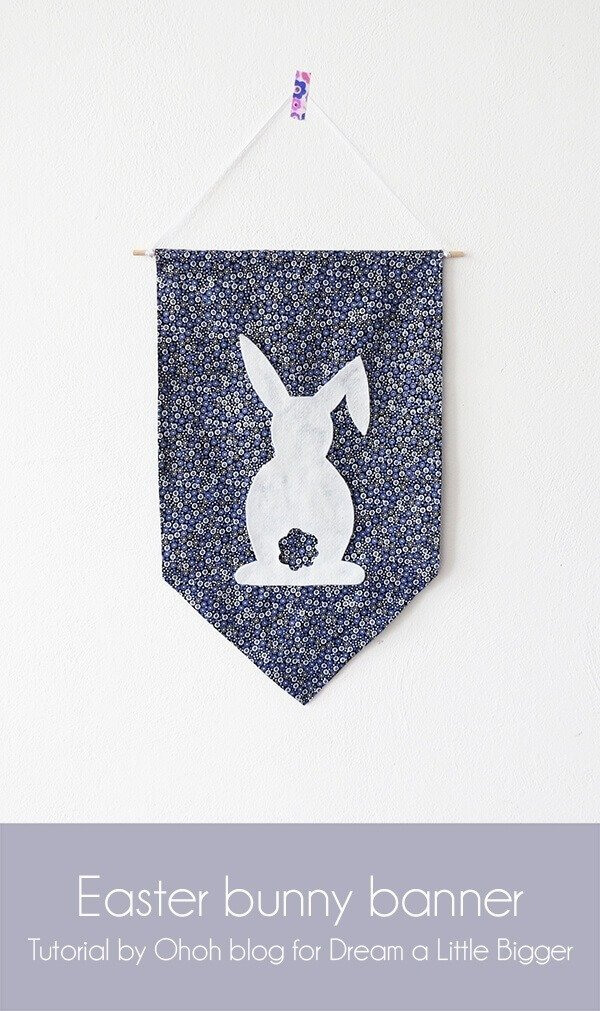
Image Source/Tutorial: Dream a Little Bigger
If you want to decorate your wall and are confused about what to try then it can be the best idea for your wall decor. It is a bunny banner that you can hang on your home wall to decorate. What’s the procedure? Don’t worry! Have a look!
Materials required:
- Fabric
- Felt
- Glue gun
- Scissor
- Wooden stick
- Ribbon
Procedure:
- Take a printed fabric and cut it in a rectangular shape. Take size accordingly.
- Fold the fabric to make it a banner. For this first fold the lengths of fabric and then one breadth in a triangle shape. You can iron it to make it perfect.
- Glue all the folds you made.
- Trace the shape of a bunny on felt and cut it out.
- Glue the bunny on the banner.
- Hang it on a wooden stick and use a ribbon to hang it on your wall.
Your decor banner is ready!
Yarn Wrapped Easter Eggs
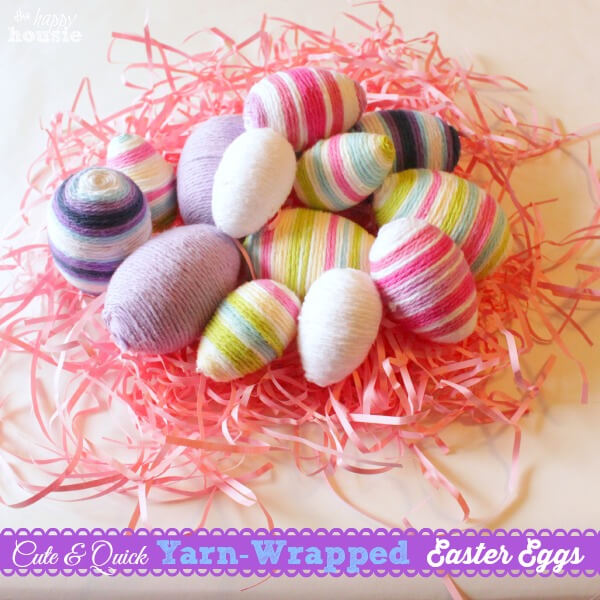
Image Source/Tutorial: The Happy Housie
You must have weaved many things. You can use the left yarn in your crafting. For this, you have to take a look at the given procedure.
Materials required:
- Cotton yarn
- Glue gun
- Scissor
- Eggs
Procedure:
- Take the yarn and add some glue to a part.
- Start wrapping around the egg.
- Repeat the process by adding glue to every step.
- Wrap the yarn until it doesn’t set up perfectly.
- At last glue the end and let it dry.
- You will see the color mixing at the glued portion.
- It gives an extra charm to the egg.
- Make other eggs by using the same procedure.
Burlap Bunny Ears

Image Source/Tutorial: Uncommon Designs
You must have old Burlap in your home. If you have then why you are not thinking about making a craft by it. Yes! Use your skill and make the bunny ears.
Materials required:
- Burlap
- Head N band
- Toilet tissue tube
- Hot glue gun
Procedure:
- Take the Burlap and create a napkin ring. For this cut the burlap into 6*4 inches.
- Fold it down to the middle from both lengths.
- Take the toilet roll and cover the burlap on it. Glue the ends.
- Now, make the ears. Take about a square of burlap and iron on a piece of head N bond to one side.
- Once cooled remove the paper backing and iron the piece of burlap on top.
- Put the glue on one end of your bunny ear and squeeze the sides together. Make another ear by using the same process.
- Glue the ears on napkin rings.
Diy Burlap Bunny Ears Pocket
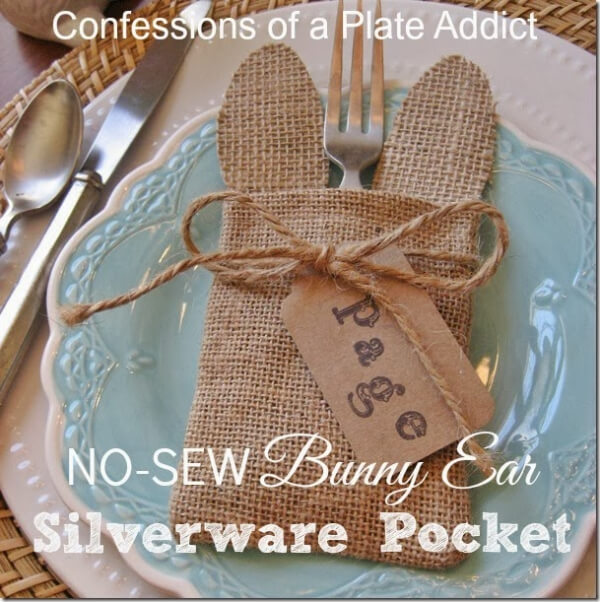
Image Source/Tutorial: Confessions of a Plate Addict
Use the burlap to make the pocket for your kids. To know the procedure follow the given instructions!
Materials required:
- Burlap envelopes
- Scissor
- Hot glue gun
- Jute twine
- Head n bond
- A scrap of burlap
Procedure:
- Cut out bunny ears from paper. Then cut the burlap according to its size.
- Open the envelope and add glue to the inner corners. Fold the flap and press it inside.
- Also, glue the corners of the pocket on the top of the fold.
- Add the ears and press them until they set.
- Tie jute twine around the pocket.
Farmhouse Bunny Door Hanger
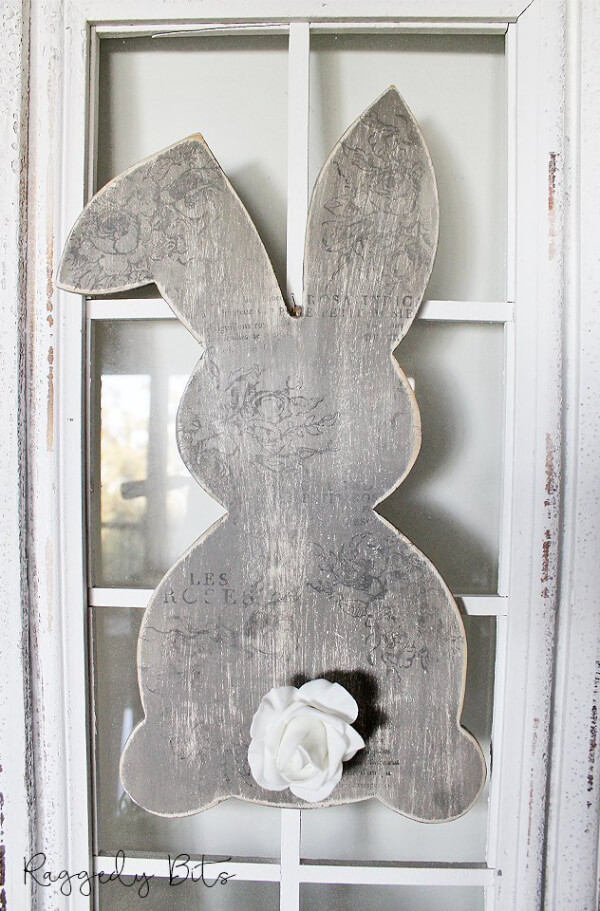
Image Source/Tutorial: Raggedy Bits
Making wall hangings is a common craft. So, try for this one. It is a bunny door hanger. You have to do some hard work for this but it increases the beauty of your door.
Materials required:
- Plywood(according to your door)
- Pencil
- Drill
- Brayer with ink
- Paints
- Flower
- Glue gun
- Claw hook
Procedure:
- Trace the bunny on your plywood. Cut it out using the drill machine.
- Now, by using sandpaper make your bunny free of any extra edges.
- Give the bunny a white mix first and then paint it.
- Using sandpaper distress your liking.
- Use the brayer to apply designs on the bunny door hangers.
- Attach a hook to the back and hang it on the door.
Wood Burned Easter Eggs
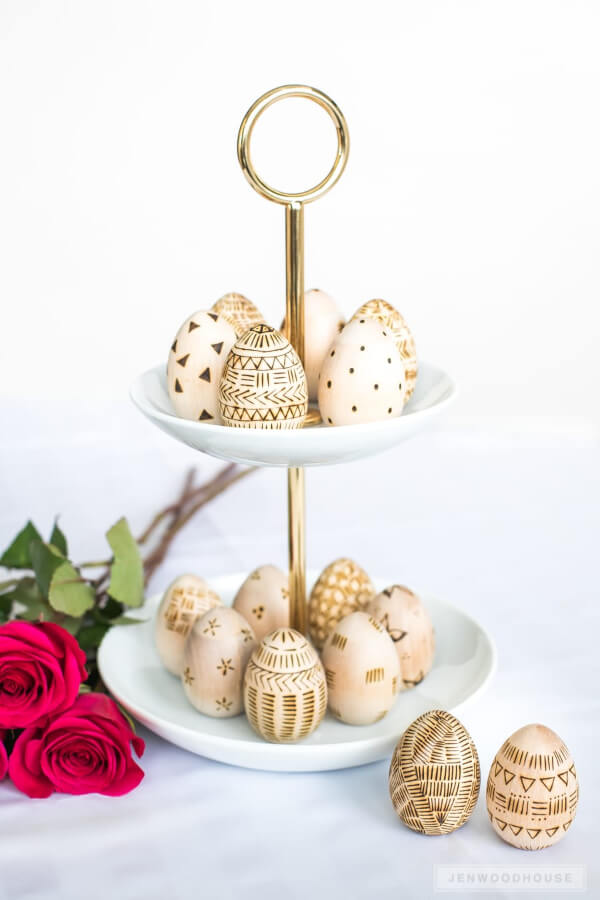
Image Source/Tutorial: Jen Woodhouse
It is an advanced way of decorating Easter eggs. You need to be very careful while making this. You are given the procedure of making. So, try this and enjoy!
Materials required:
- Bernzomatic torch
- Bernzomatic Butane cylinder
- Unfinished wooden eggs
- Gloves
- Safety glasses
Procedure:
- Fill the torch with butane and fire up.
- Wear protective gloves.
- Make various designs on eggs by using it on some eggs to draw simple small straight lines and on others, you can try triangles also.
- Make designs using your own creativity.
- It will add charm to your eggs.
Beautiful Burlap Easter Bunny
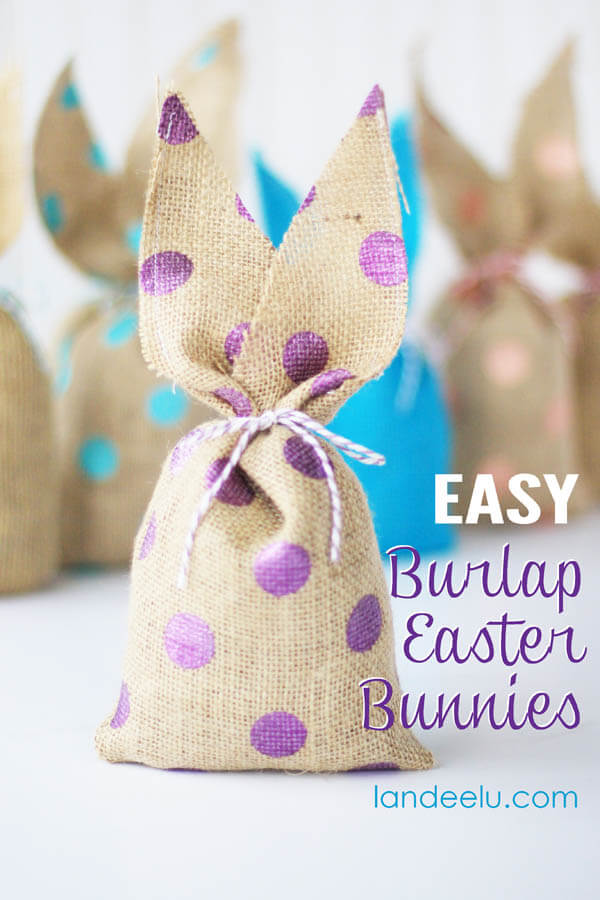
Image Source/Tutorial: Landeelu
Make your beautiful easter bunny with some easy steps. You can try this idea for your easter occasion. Simply follow the given steps to make this.
Materials required:
- Burlap
- Thread
- Twine
- Scissor
- Glue gun
- Rice
- Thread and needle
Procedure:
- Cut two layers of burlap in a rectangular shape. Take size according to how big you want your bunny.
- Put the right sides of the burlap together and pin them.
- Stitch the three sides of the rectangle leaving the top open.
- Cut the top of the burlap into the shape of Bunny’s ears.
- Fill the burlap with rice etc.
- Tie the burlap with twine.
Your beautiful bunny burlap is ready! You can give it to your kids as a gift.
For more bunny crafting ideas stay connected with us! You will get new creativity as well as learning!
You may like these:
Simple and Distinctive Craft Projects Suitable for All Skill Levels
Enjoy easy yet unique craft ideas that anyone can create, perfect for fostering creativity and enjoyment across all ages and skill levels.
Do-It-Yourself Craft Ideas Designed for Teenagers
Discover creative and age-appropriate DIY craft projects for teens, encouraging self-expression and hands-on skills through innovative and enjoyable activities.
Innovative Craft Projects for Classroom Activities with Children
Enhance classroom learning with creative and educational craft ideas, designed to inspire imagination and collaboration among students in a fun, hands-on environment.
Educational DIY Crafts and Activities for Kids to Learn Through Play

Combine learning and fun with educational DIY crafts, helping children develop skills and knowledge through engaging, hands-on activities that promote creativity and exploration.
New Year’s Eve Craft Projects and Activities Designed for Toddlers
Celebrate New Year’s Eve with fun and simple crafts and activities tailored for toddlers, combining creativity and festive joy for young learners.


