We all know about apples, it’s a fruit which we all have eaten once or more than a thousand times. It has so many benefits on daily basis. Even doctors recommend eating an apple every day so that the body can gain some good nutrition. Kids are made to learn their first letter A with an example of an Apple. Apples are very common to know and for children these common or daily usage things if provided for an activity process then it makes them very active to know more about the things which they already know or see daily. This fruit is available almost everywhere these days and unseasonal too.
Contents
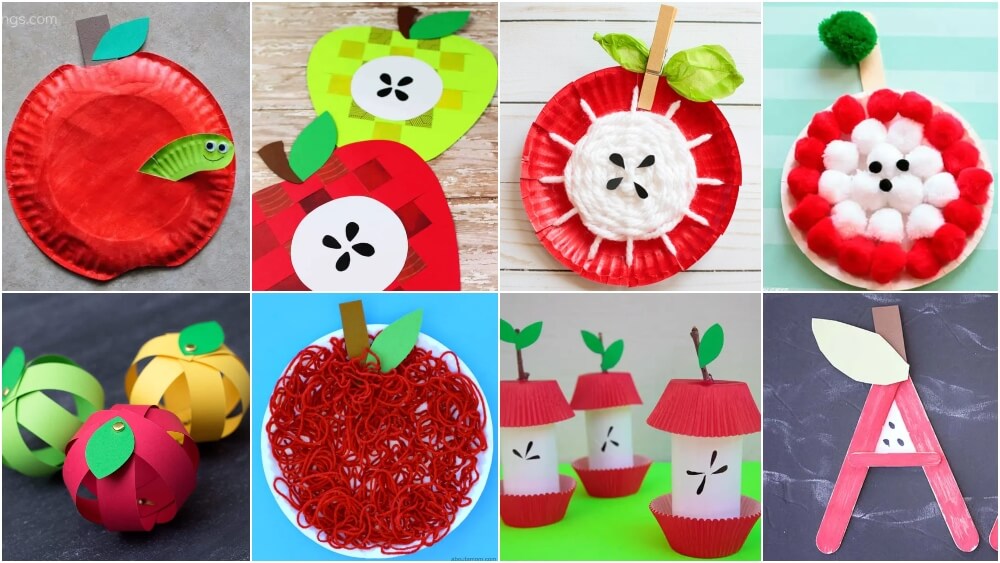
- Simple Apple Crafts For Kids
- Paper Plate Apple Crafts For Kids
- Lollipop Apple Craft Ideas
- Craft With Ice Cream Sticks
- Apple crafts made out of muffin wraps
- Apple Crafts For Kindergarten Kids
- Apple with paper plates
- Apple Arts With Caustic Soda
- Paper Art Designer Apples
- Hand Print Apples
- Apple Crafts With Clay
- Apple Craft Made Of Pinecone
- Ice Cream Sticks Apple Craft Ideas
- Kindergarten Apple Drawing Ideas
- Apple Stitching
- Apple Crafts With Watercolours
- Paper Apple Crafts
- Spong Print Apple Ideas
- Paper Plate Half Bitten Apple Craft Ideas
- Apple Crafts Made Out Of Clothes
- Tissue Paper Apple Craft
- Paper Plate Apple Craft Ideas
- Tissue Paper Apple Crafts
- Apple Crafts With Wooden Clips
- Apple Prints Crafts
- Button Art Apple Ideas
- Clay Art Apple Ideas
- Pompom Apple Tree Craft
- Paper Apple Craft Ideas
- Bubble Wrap Apple Craft
- Pom-Pom Apple
- You may like these:
Simple Apple Crafts For Kids

Paper Plate Apple Crafts For Kids
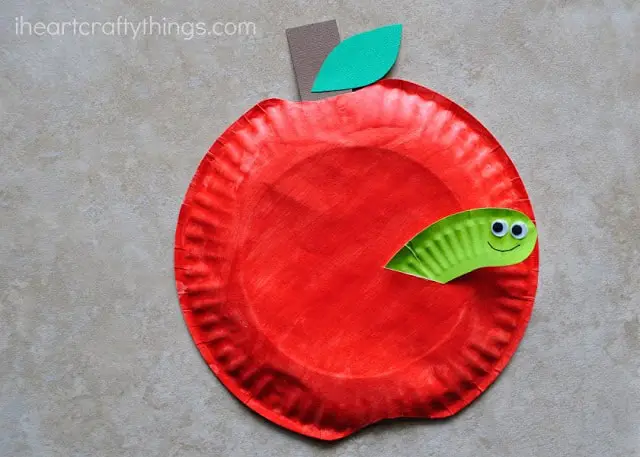
Image Source/Tutorial: I Heart Crafty Things
Things required:
- Two paper plate
- Red, green, and blue paint
- Scissors
- Glue
- Googly eyes
You just need to cut the plate from the top and bottom a little portion only then paint it red and stick a cardboard piece and stick a shape of the leaf in green color. For a twist the picture shown below have a worm in the apple it looks cute, right? You can use that cut-out part of the paper plate paint it green and then stick it as shown. And your apple with a cute worm is ready.
Please visit our website for more interesting craft ideas.
And Leave your lovely comments to let us know what ideas you want us to make an article on. Your opinion matters.
Lollipop Apple Craft Ideas
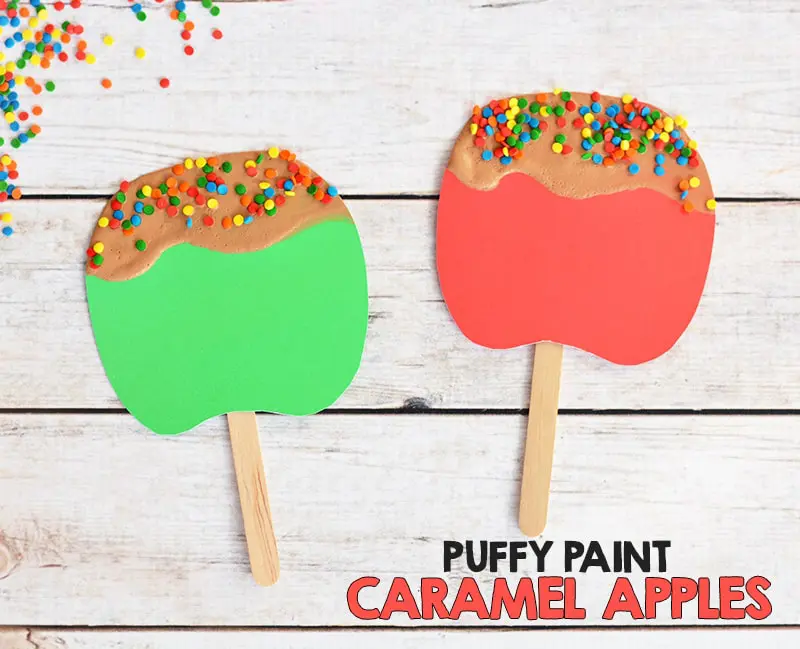
Image Source/Tutorial: I Heart Arts n Crafts
Things required:
- Green and orange chart paper
- Wooden ice cream sticks
- Decorative items ( sprinkle, colorful Thermocol balls)
- Glue
- Scissors
- Yellow and brown paint
- Paint brushes
Cut out the apple shapes from green and orange chart paper. Mix the yellow and little brown paint to make it caramel-like color and then paint it half on the apple and then sprinkle the colorful decoration items you have. Let it dry
At last stick the ice cream stick at the back.
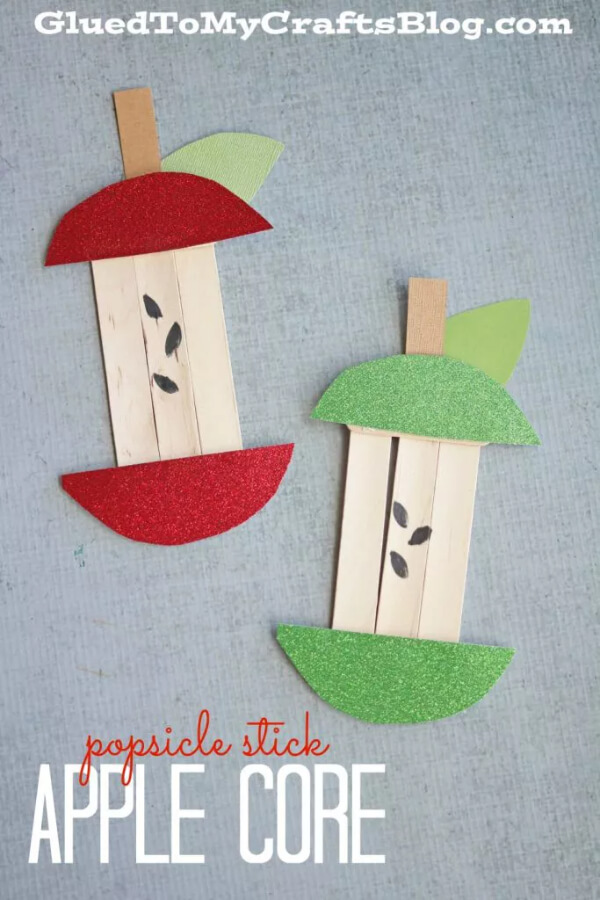
Craft With Ice Cream Sticks
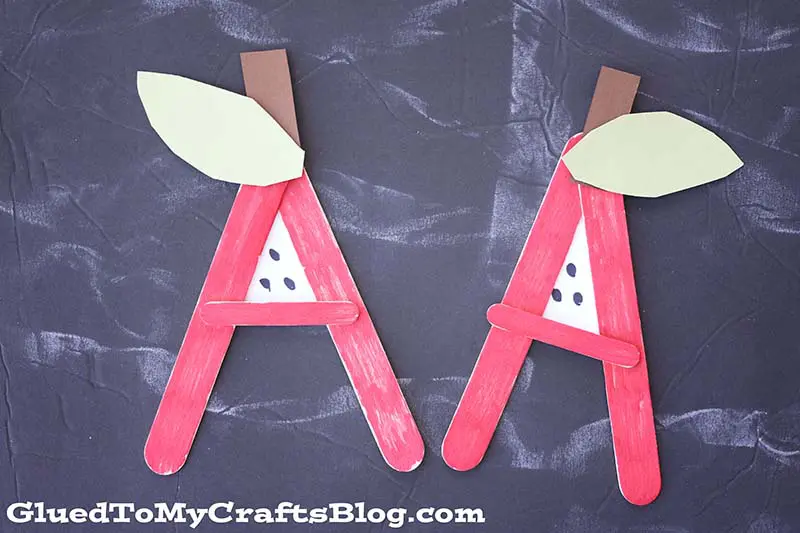
Image Source/Tutorial: Glued to My Crafts
Things required:
- Ice cream sticks
- Glue
- Scissors
- Red color pencil
- Green, white and brown chart paper
- Black marker
Just color the sticks with red color and stick them in the shape of ( A ) . Cut the leaves from green chart paper and the stem from the brown chart paper and then stick both of them. Now stick a white paper at the back of the ( A ) triangle and then mark with a black marker.
Apple crafts made out of muffin wraps
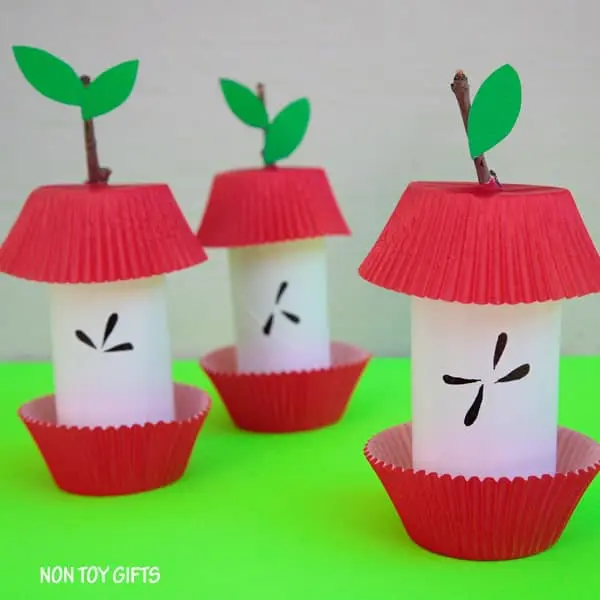
Image Source/Tutorial: Non-Toy Gifts
Things required :
- Red color muffin wraps
- Cardboard rolls
- Green and white chart paper
- Glue
- Scissors
- Black marker
- Real but non-using stems ( you can take them from your garden or where the stems are already broken ) don’t break any plant as we all know plants are live savers so we should not harm any of them.
Paste the white chart paper onto the cardboard roll and then mark with a marker as shown in the image below. Now stick the red muffin wraps on the top and bottom so that it can look like the half-eaten apple. Now place the stem at the top and stick it or make a small hole and dump it half into it and cut small leaves out of the green chart paper and stick them on the stem.
Apple Crafts For Kindergarten Kids
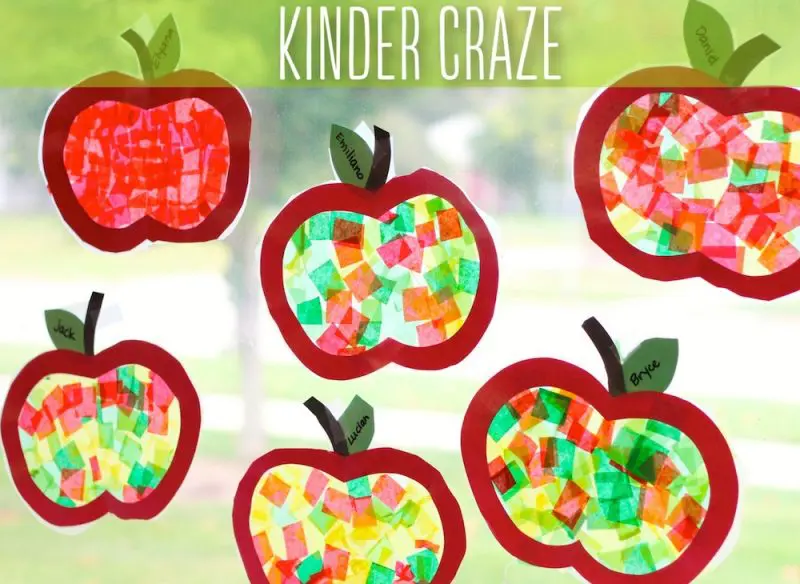
Image Source/Tutorial: Kinder-Craze
Things required:
- Clear contact sheets -2
- Construction paper -1 ( red)
- Construction paper -1 ( green )
- Construction paper -1 ( black)
- Green, red and yellow tissue paper
These types are used for kindergarten Garten crafts where teachers can provide them with the things and instruct the kids on what to do and let them do this on their own. It develops their skills.
Read More: Easter Crafts for Parents to Make with Kids
Apple with paper plates
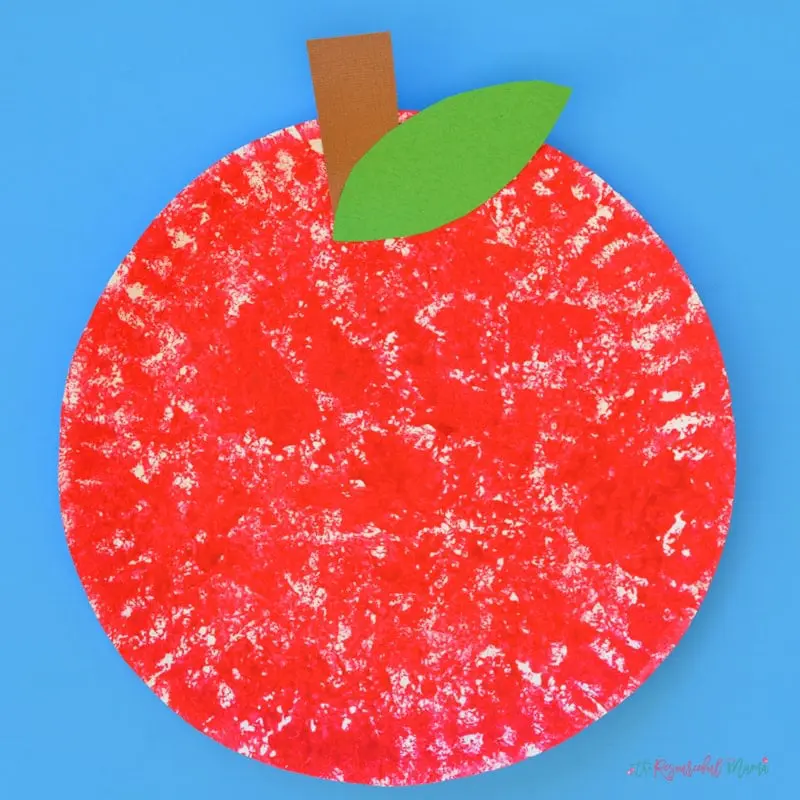
Image Source/Tutorial: The Resourceful Mama
Things required :
- Paper plate
- Fevicol
- Scissors
- Brown paper
- Green paper
- Sponge
- Red and green paint
- Paint brushes
Using the sponge, use red color and paint the paper plate then and then cut out a leaf shape and paint it green then stick it as shown.
Apple Arts With Caustic Soda
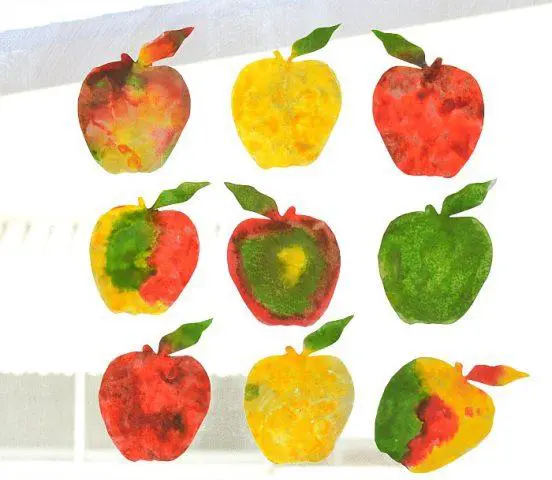
Image Source/Tutorial: Fun Littles
Things required:
- Citric acid
- Food color
- Baking soda
- Sheets for making apple cutouts
- Scissors
- Glue
These kinds of craft ideas will help the children to know more about the elements, materials, and external things we are using on a daily basis.
Paper Art Designer Apples
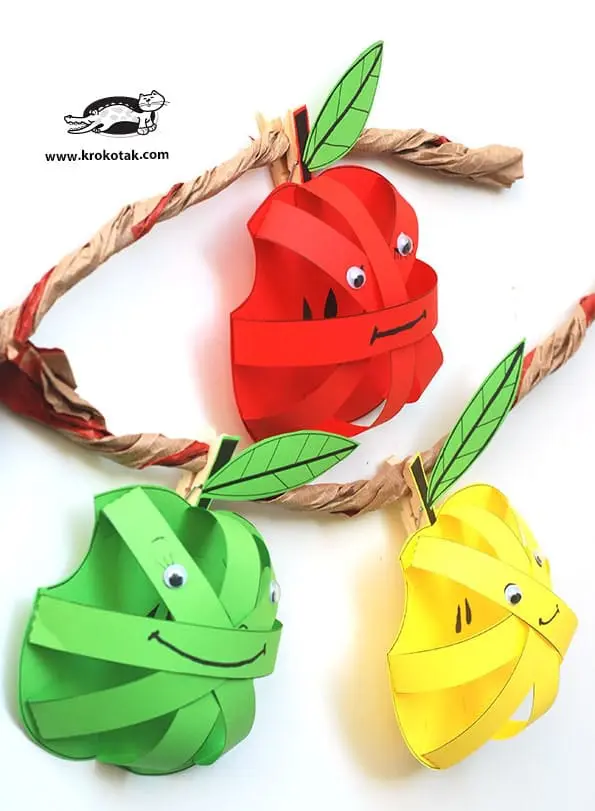
Image Source/Tutorial: Krokotak
Things required:
- Green sheet
- Red sheet
- Scissors
- glue
- Marker – Black
Cut an apple-shaped with a small bite on it you can see the picture below and get an idea of how will it look. Then cut 4-5 long stripes of the same color sheets as shown then stick them on the apple as shown. Cut out a leaf-shaped of green color and stick on it as shown. Highlight the seeds of the apple and the stem at the top with the help of the black marker.
Hand Print Apples
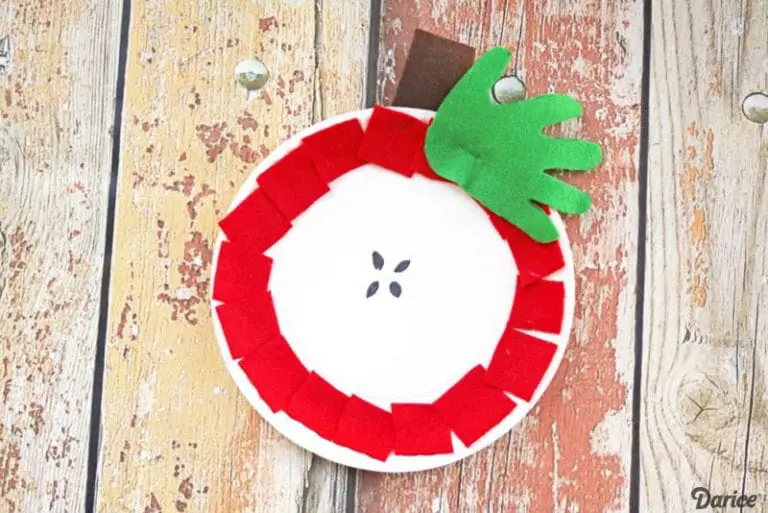
Image Source/Tutorial: Live Craft Love
Things required :
- White sheet
- Green sheet
- Red sheet
- Brown sheet
- Black marker
- Glue
- Scissors
Cut out a medium size circle and then cut small squares from a red color sheet and then mark your hand on the green sheet then cut it out stick as shown and then for the stem use a brown sheet. Define the seeds with the help of a black marker.
Apple Crafts With Clay
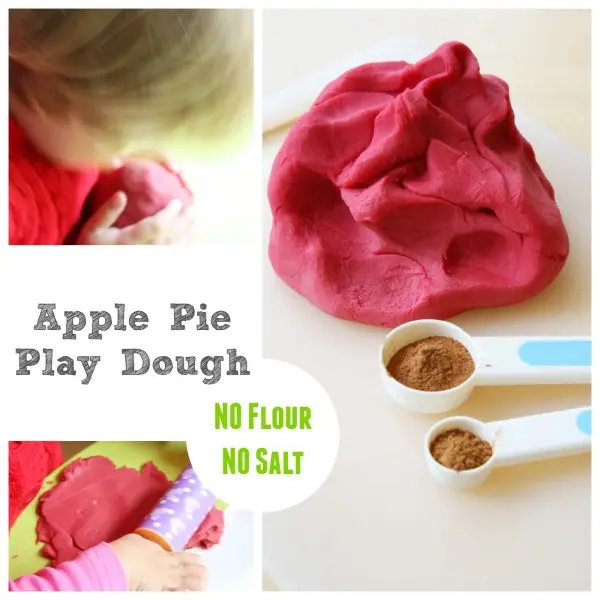
Image Source/Tutorial: Emma Owl
Things required:
- Water
- Vegetable oil
- Food color – red ( for apple )
- Corn flour
- Essential or can use spices like cinnamon or all spices
Heat the pan, put water and add a few drops of food color in it then gradually add the corn flour and then mix it well till it turns flowy and at last, all gets together into a Dough form after that after cooking it properly turn off the gas and keep it aside till it fools down and then knead it and at last add the essential oils or the spices and now it’s ready to make the apple out of it.
Read More: Fingerprint Art & Crafts for Kids
Apple Craft Made Of Pinecone
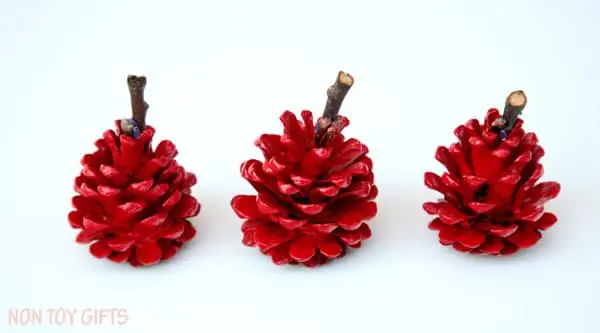
Image Source/Tutorial: Non-Toy Gifts
Things required :
- Pine cone
- Paint – red color
- Paintbrush
- Glue
- Scissors
- Green sheet
Take the small-sized pine cone paint it red using the paint and then let it dry. When the pine cone is completely dry now cut the leaves and stick it as shown using the glue and there you go your pine cone apple is ready.
Ice Cream Sticks Apple Craft Ideas
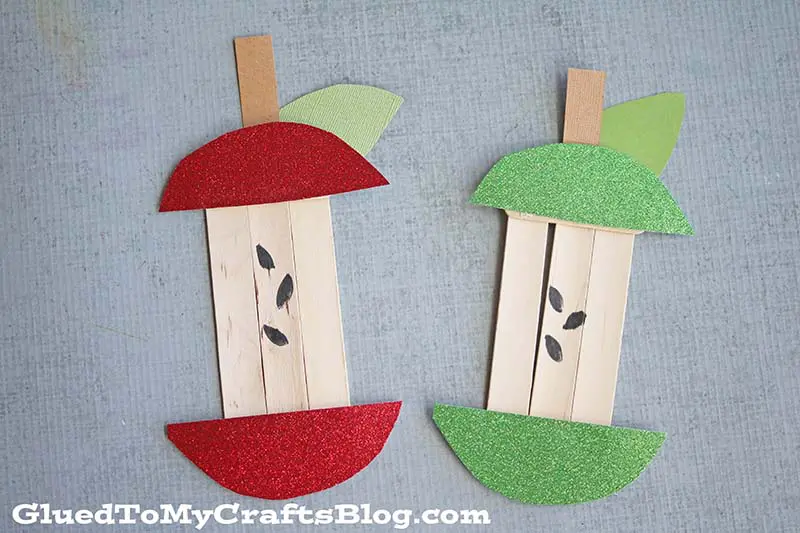
Image Source/Tutorial: Glued to My Crafts
Things required:
- Ice cream sticks
- Green sheet
- Brown sheet
- Red sparkling paper
- Green sparkling paper
- Glue
- Black marker
- Scissors
Firstly cut out a circle from the red sparkling paper and some do it with the green sparkling paper after taking out the circle cut it in half. Now take the ice cream sticks and take three of them together as shown in the image below after that stick the red sparkling paper and green sparkling paper on the ice cream sticks as shown. Using the black marker make the seeds in the middle of the ice cream sticks. For making the leaves of the apple use a green sheet and cut it into the shape of the leaf, don’t forget to make the stem using brown paper.
Kindergarten Apple Drawing Ideas
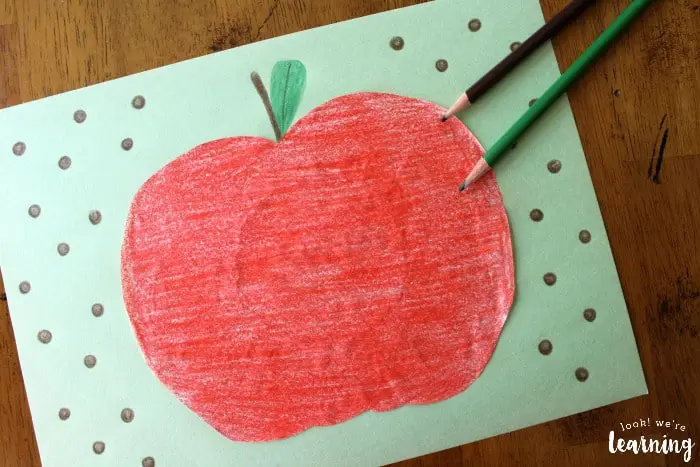
Image Source/Tutorial: Look We Are Learning
Things required :
- White or green sheet
- White paper
- Scissors
- Glue
- Pencil colors( red, brown, green )
Your first step is to cut out an Apple shaped from the white paper and stick it on the green or white sheet as shown in the image below. Now color the cutout apple in red color as we all know apples are always indicated or mostly indicated in red colors so color the cut out in red color and then make the leaf with green color and stem with brown color. For more designs or background designs, you can add whatever drawings or designs you want.
Apple Stitching
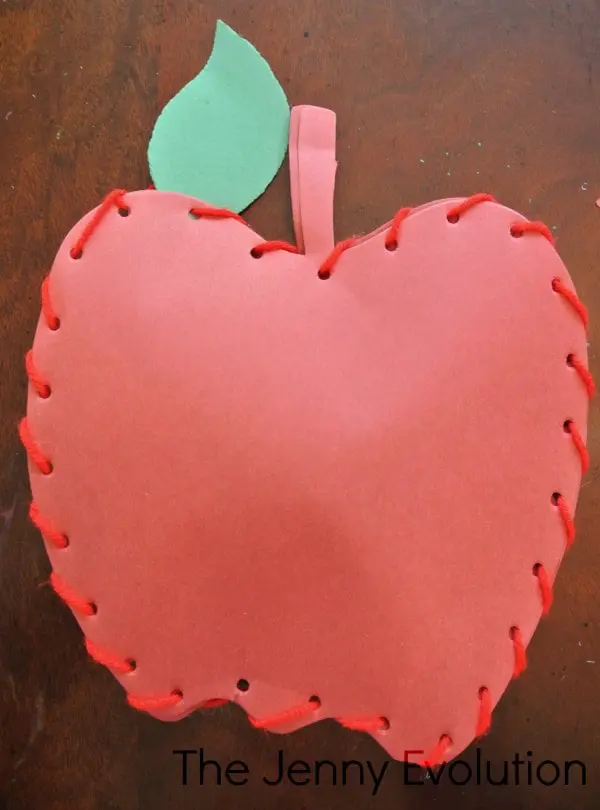
Image Source/Tutorial: Mommy Evolution
Things required:
- Red paper
- Green paper
- Wool or yarn
- Scissors
- Glue
- Hole puncher
- Cotton ( for stuffing)
The first thing you need to do is to cut it out to the same size and shape as an apple. Now using the whole puncture punch the whole on the whole border of the Apple shaped from the red color sheet for reference you can see the image below after that using the wool or yarn stitch the apples through the whole punched as shown but remember stitch only half a portion as because you need to stuff the Apple too with the cotton. After stuffing the Apple now stitch holes in the Apple so that no cotton can come outside and the Apple becomes somewhat fluffy. After you body of an apple is ready you can move on to the leaf and stem making you can just cut out the leaf shape from the green sheet.
Apple Crafts With Watercolours
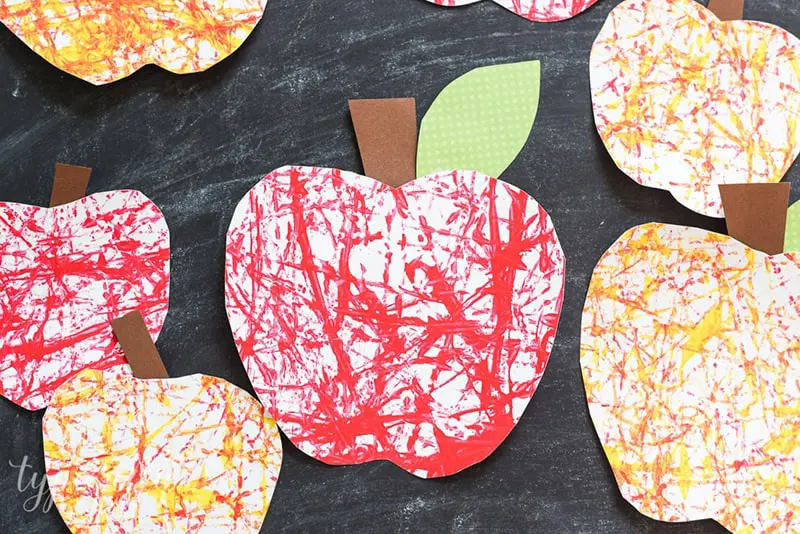
Image Source/Tutorial: The Crafting Chicks
Things required:
- Watercolors ( red, yellow, green )
- Paint Brushes
- Green sheet
- Brown sheet
- White sheet
- Glue
- Scissors
Cut out the Apple shape from the white sheet and then cut out the leaves and stem leaves from the green sheet and stem from the brown sheet. Now take the Apple cut out and take the paint brushes and pain with the watercolors you can use red as it is mentioned it is an apple so give that brush in the watercolors, dip it in such a way that the brush is dripping with watercolors and then move and spat of on the cut out of apple using the brush that it forms a design, do as many times and design you want to achieve and after that let it get dry and at last stick the leaf and steam to complete the apple.
Read More: Apple Subtraction Worksheets for Kids
Paper Apple Crafts
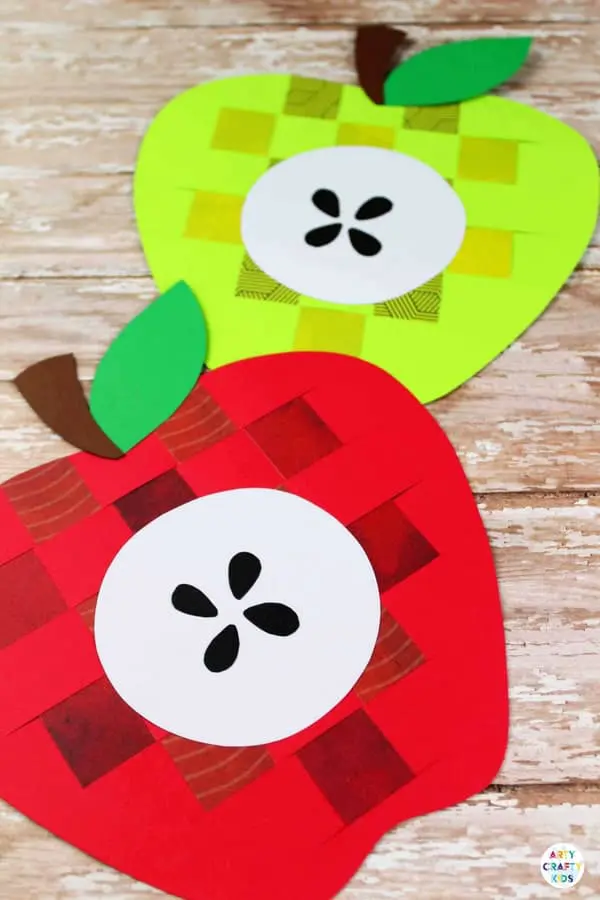
Image Source/Tutorial: Arty Crafty Kids
Things required :
- Red sheet
- White sheet
- Green sheet
- Brown sheet
- Black sheet
- Designer sheet ( any designs )
- Scissors
- Glue
Download and print the apple template as shown then repeat the same for the stem ad leaves too. Use red and green for apples and use green for leaves at last use brown for stem.
Now cut the strips from pattern paper then weave them as shown and stick them too so that the pattern is stable while you stuck that pattern weaved on the apple it is fixed at a place and maintains its pattern.
Cut out a medium-sized white Circle stick in the middle and then cut black seeds shape from the Black sheet and stick them too.
Spong Print Apple Ideas
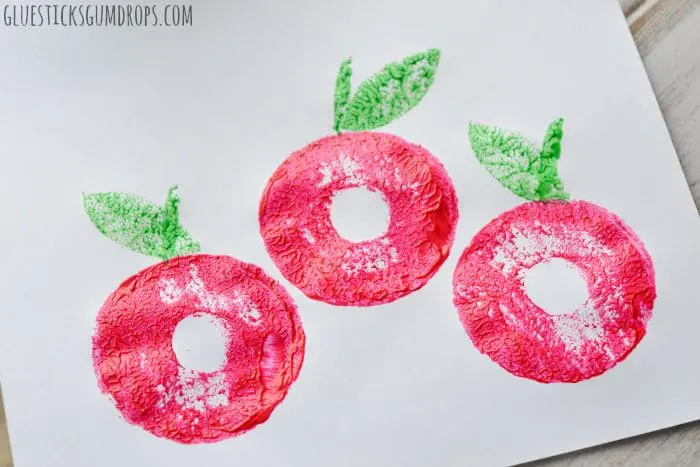
Image Source/Tutorial: Gluesticks and Gumdrops
Things required:
- Spong
- Scissors or paper cutters
- Red and green paint
- Brushes
- White sheet
Cut out a circular shape from the sponge with a small hole inside too as you can see in the image itself and after that cut the shapes of the leaf too. Then take the red color and paint it one coat of red color in the current ring cut and then sponge its print on the white paper do it two-three more times as shown. After that do the same with the green paint for leaves and for stems use any side of any spot to create a line. Then let it dry.
Paper Plate Half Bitten Apple Craft Ideas
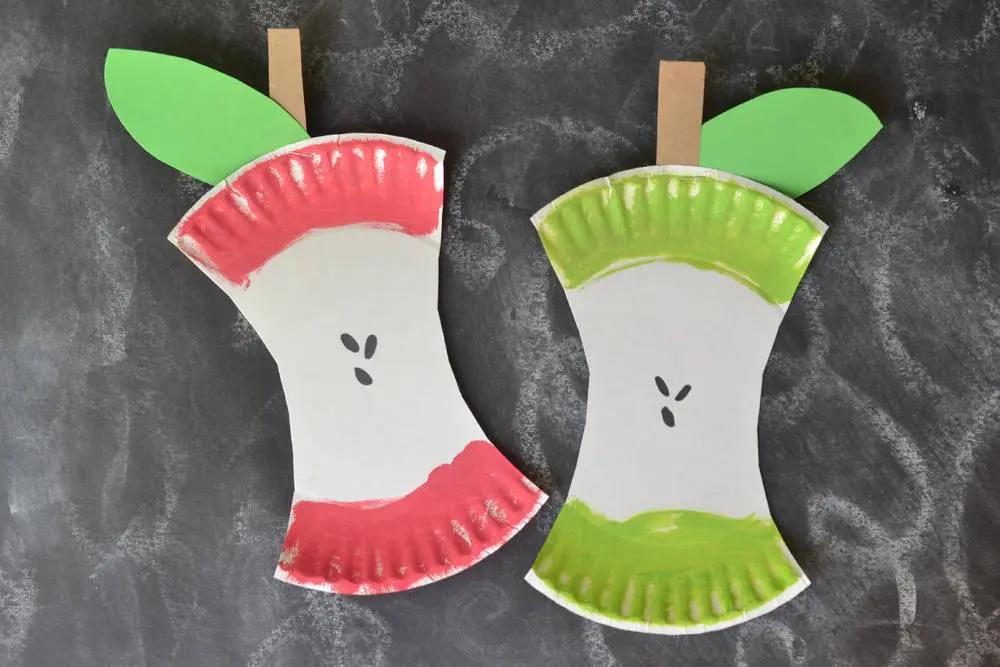
Image Source/Tutorial: Blitsy
Things required:
- Paper plate
- Red paint
- Green paint
- Paint brushes
- Green sheet
- Brown sheet
- Scissors
- Glue
- Black marker
Take a people plate and cut it from the sides so that it looks like it has been eaten from both sides are shown in the image below. Now use the red paint and paints the top and bottom of that cutout but not the middle one leave it for making seeds do the same for the green apple take reference from the image below. Now cut out the leave from the green sheet for both the apples and do the same for the stem from the brown sheet. Stick the leaf and stem as shown with the help of glue and at last draw the seeds using the black marker.
Apple Crafts Made Out Of Clothes
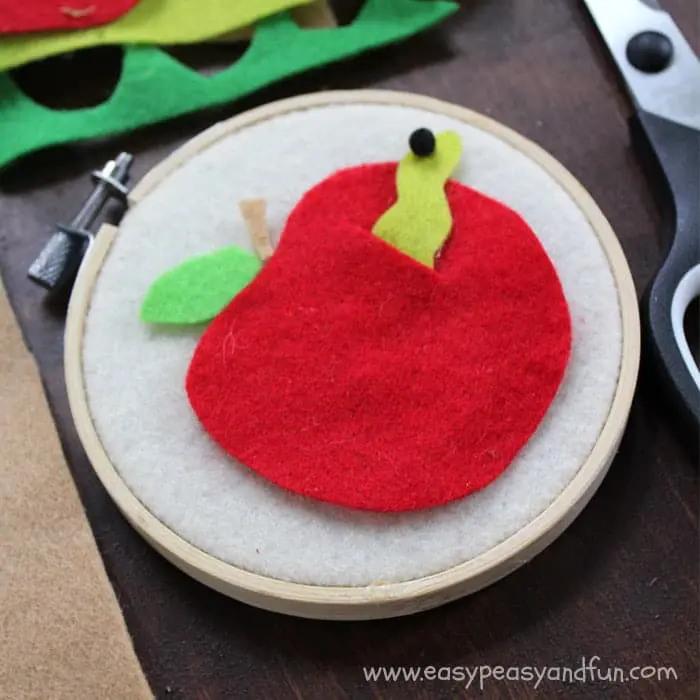
Image Source/Tutorial: Easy Peasy and Fun
Things required:
- Embroidery hoop wooden
- Felt sheet – red, green, white, brown
- Black pompom – small
- Googly eye
- Scissors
- Craft glue
Place the white felt sheet in the embroidery hoop nicely so that it won’t move while working then cut out the apple body from the red felt sheet and leaves from the green felt sheet followed by the stem from the brow. As shown if you want you can add a cute little worm too so for that cut that worm shape from the green felt sheet and stick all of them as shown in the picture below. Use the small black pompom for making the eye of the worm. Stick all of them with the help of craft glue and let them dry properly.
Tissue Paper Apple Craft
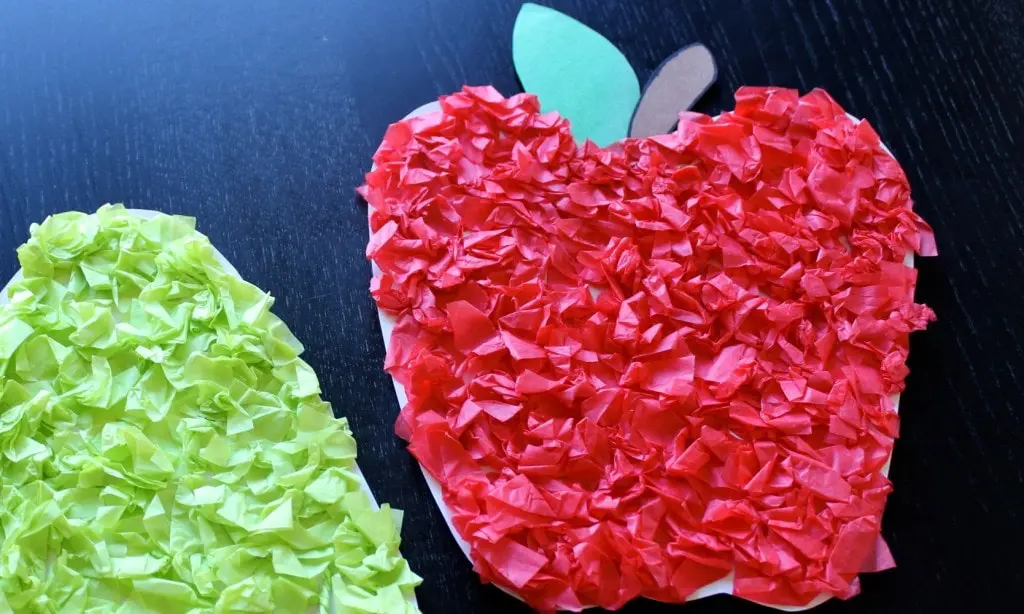
Image Source/Tutorial: Messes to Memories
Things required:
- Red tissue paper
- Green tissue paper
- White sheet
- Green sheet
- Brown sheet
- Scissors
- Glue
Take the white sheet and cut out an Apple shape from it then take the glue and glue it all over the cut Apple but just only one side then take the tissue paper red once crinkle it and then stick it all over where you have glued. Then do the same for the green one with green tissue paper and then cut out the stem from the brown sheet and leave it from the green sheet and stick them in the proper places as shown in the image.
Read More: Apple Addition Worksheets for Kids
Paper Plate Apple Craft Ideas
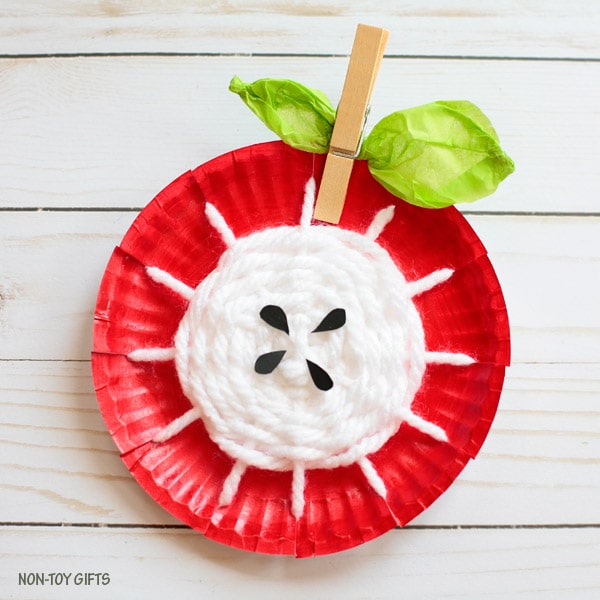
Image Source/Tutorial: Non-Toy Gifts
Things required:
- Paper plate
- White wool or yarn
- Green paper
- Wooden clips
- Scissors
- Glue
- Black sheet
- Red paint
- Paintbrush
Take the paper plate and paint it with red colors let it dry and after that make half on the boundary of the paper plate as soon please, now using the wool or yarn make that white portion and stick it with glue to make it fixed at a place. After making that take the green shade and fold it in such a way that it forms the leaf shape and then clip it with the help of a wooden clip as shown in the image below. Don’t forget to add the seeds using the black sheet so now it completes the full look of Apple.
Tissue Paper Apple Crafts
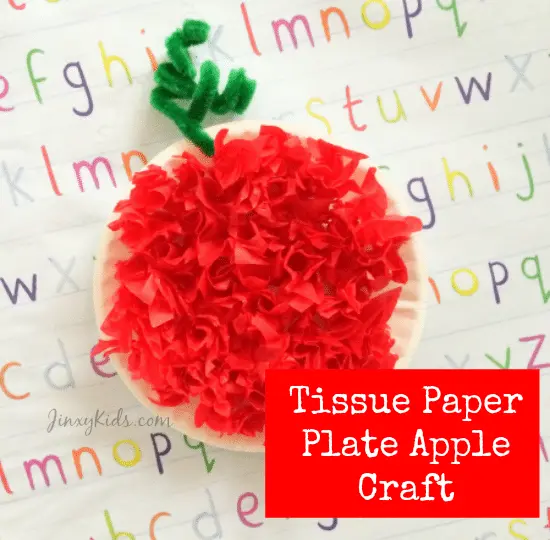
Image Source/Tutorial: Jinxy Kids
Things required:
- Red tissue paper
- A muffin cup
- Glue
- Green wool or yarn
- Scissors
Take the muffin cup and then glue it inside only then take the red tissue paper to crinkle it and then stick it one by one as shown in the picture and let it dry. Then make a hole at the top and pass a string of green thread for making the leaf.
Apple Crafts With Wooden Clips
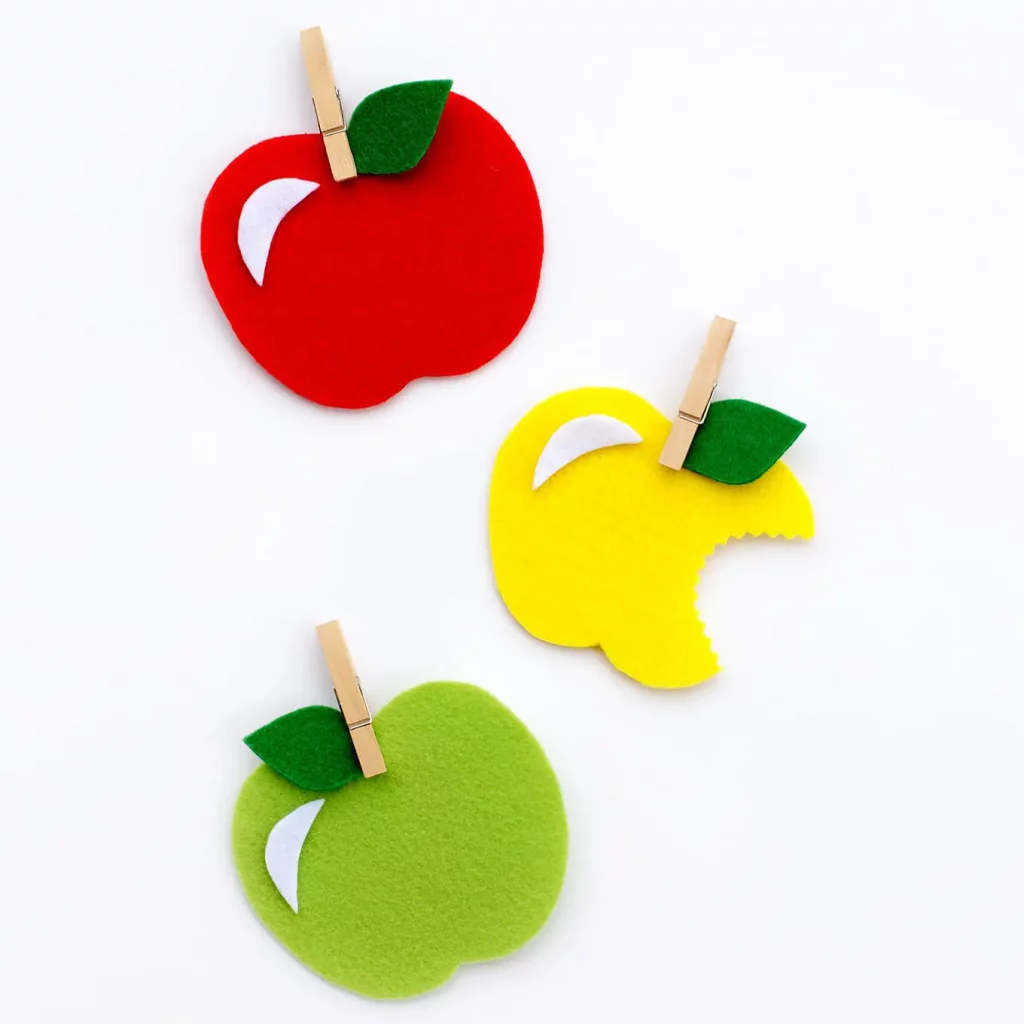
Image Source/Tutorial: Fireflies and Mudpies
Things required :
- Red felt paper
- Light green felt paper
- Yellow felt paper
- White felt paper
- Dark green felt paper
- Wooden clips
- Scissors
- Glue
Take the red felt paper and cut it into an apple shape and cut the leaf from dark green felt paper. Cut the moon ( small ) as shown in the image below then stick that moon as shown and the leaf too and for the stem use the wooden clip. Take the clip and clip it on the leaf as it looks like the stem and the leaf is joined together. Do the same process for the green apple. And if you want that bitten apple portion you just need to cut the bite using any paper cutter or scissor that’s it.
Apple Prints Crafts
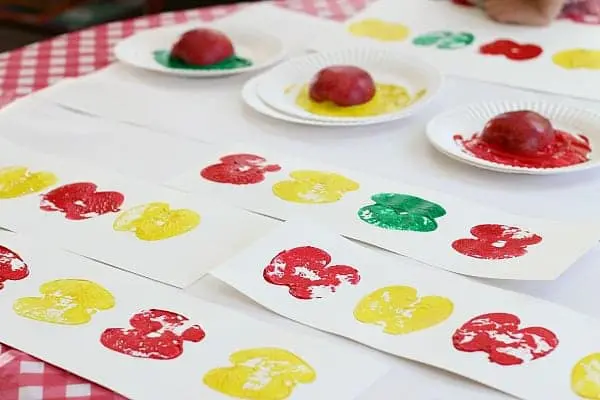
Things required:
- Real apple
- Knife
- Red paint
- Green paint
- Yellow paint
- White sheet
Firstly take the apple and cut it into half as we always do now take the white sheet and then take the half off an apple and paint it red on the white portion only and as soon as you paint print that part on the white sheet so that the white should get a print of that half cut apple do the same with yellow and green paint with other apples. Let it dry and your printed apple is ready.
Button Art Apple Ideas
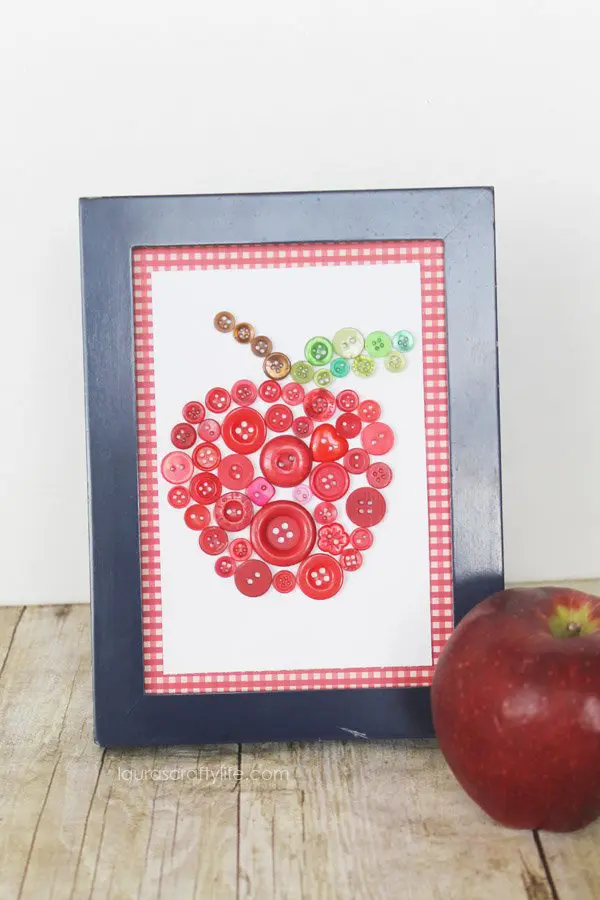
Image Source/Tutorial: Laura’s Crafty Life
Things required:
- Red color small buttons
- Red color big buttons
- Pink color big buttons
- Pink color small buttons
- Green color small buttons
- Green color big buttons
- Brown color big and small buttons
- White sheet
- Fevicol
( Remember you can make them from one particular size buttons too or if you want to mix and make them you can decide the quantity of big and small as per your convenience)
You have to fir make the outer border of the apple using the buttons only and stick them on the white sheet using Fevicol, take reference fr the image below. Now it’s time to fill in take any size red, or pink color buttons and fill inside the border as shown, and then make the leaf and stem with green and brown buttons too. Let it dry and your button apple is ready to showcase.
Read More: Why are there so many types of apples?
Clay Art Apple Ideas
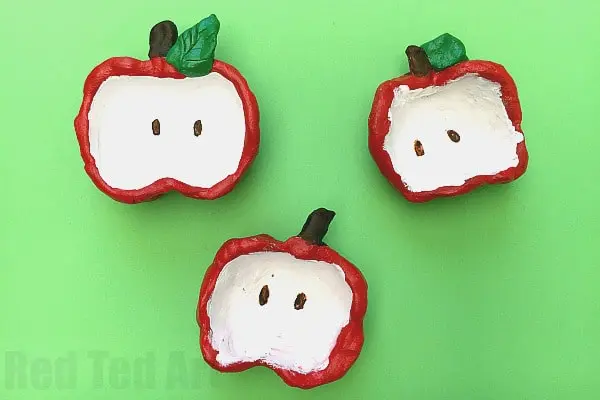
Image Source/Tutorial: Red Ted Art
Things required :
- Clay
- Red paint
- Green paint
- Brow paint
- Paint brushes
- Black paint
- White paint
Take the clay from a ball after that using your thumb dumb in and make it a bowl but the shape of an apple as shown in the picture and don’t forget to make the stem and the leaf. Use g water and your fingers fill up the cracks so that it looks smooth and it will be easy to paint the apples.
Now let it dry. After it dries up paint the apple inside white and border red and back also read, brown for stem and leaves green. Let it dry after it dries make the seeds with black paint and again dry it.
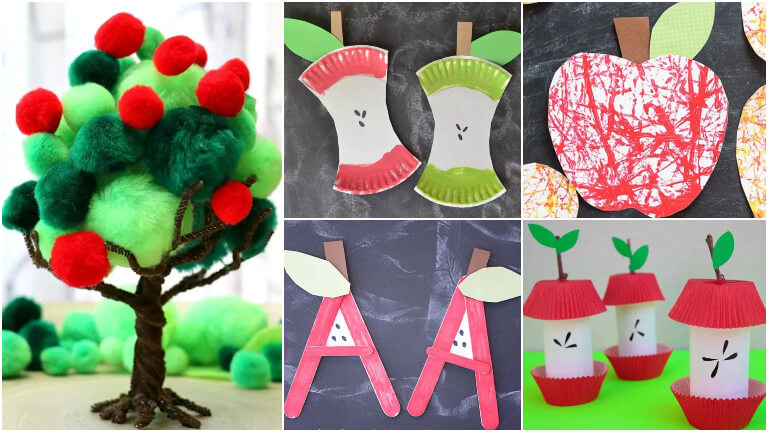
Pompom Apple Tree Craft
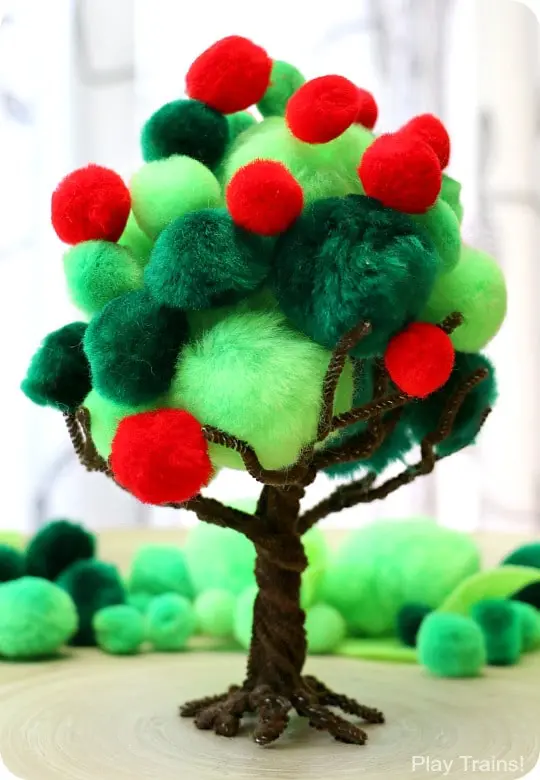
Image Source/Tutorial: Play Trains
Things required :
- Dark green pompom
- Red pompom
- Light green pompom
- Glue
- Wire
- Wool
First of all, using the wire make the base of the pompom tree that is the body and the branch of the tree and make it as in the branches in the top can be in a shape of a cup of containers shown so that it can hold the pompom. Now cover that base with the brown wool using the glue to stick it up. After that stick, the pompom is shown as the definition of the leaves, and at the top sides means outer ways stick the red pompoms only to show that it’s the apples. Your pompom apple tree is ready and it looks super duper cute. It can also be used as a decorative item.
Paper Apple Craft Ideas
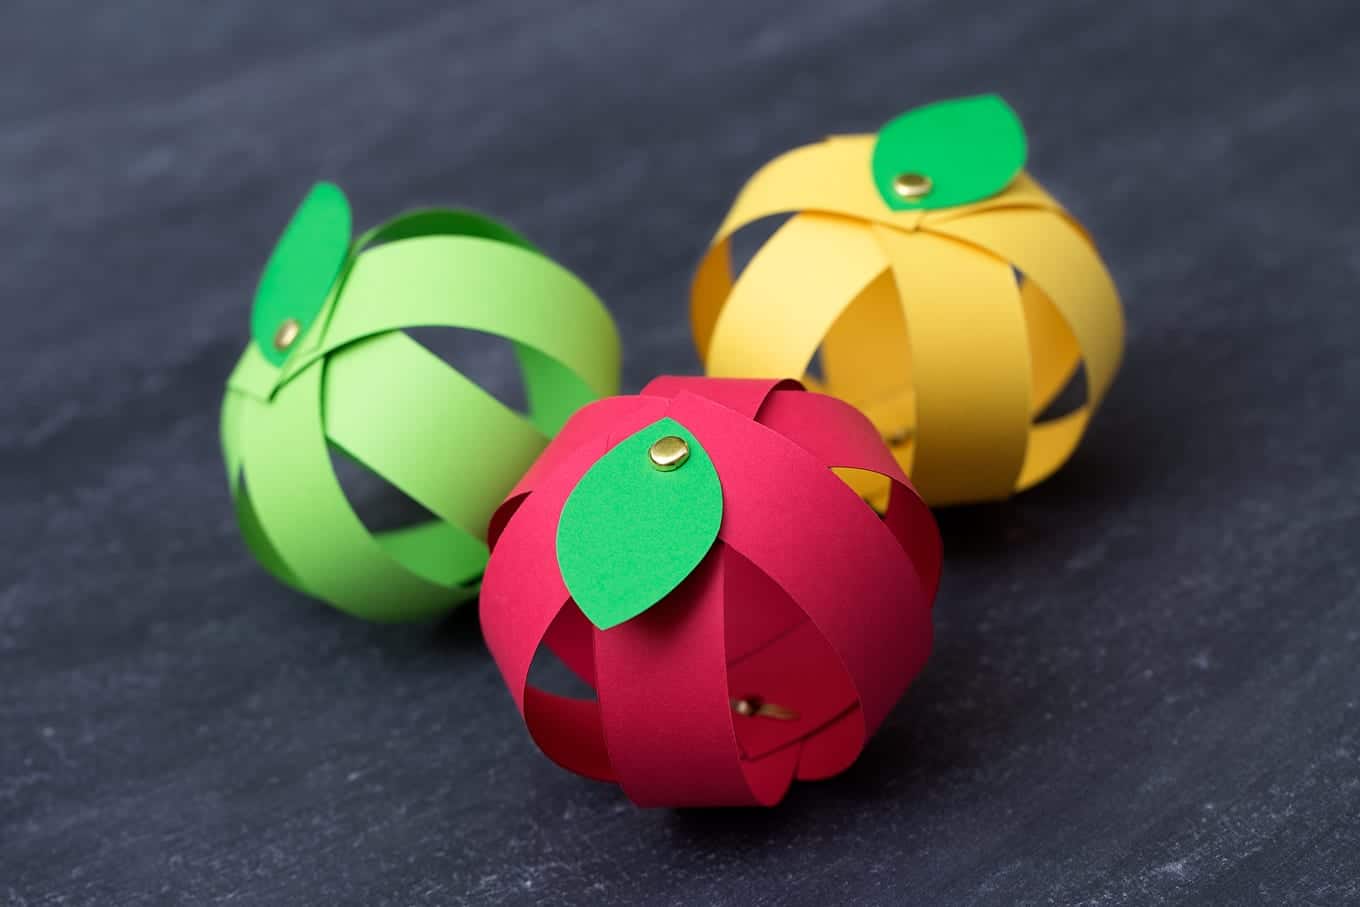
Image Source/Tutorial: Fireflies and Mudpies
Things required:
- Paper straps ( any color you want ) let take red color as we are making an apple
- Green sheets
- Yellow sheets
- Scissors
- Glue
- Hole puncher
- Brass fasteners
Cut out the straps as shown and then cut out the leaves too from the green sheet now attach one upon one so that it forms a circular form then using the hole puncher punch a hole at the top but first keep in mind that using the glue you stuck all of them together after hole punching use the brass fasteners to fasten and keep them tightly at one place. And then stick the leaf on the top with the help of glue and it’s ready now.
Bubble Wrap Apple Craft

Image Source/Tutorial: Typically Simple
Things required:
- Bubble wrap
- Scissors
- Paints (red color )
- White sheet
- Brown sheet
- Green sheet
- Glue
- Paint brushes
Take the white sheet and cut it into an apple shape now take out your red color using your brushes paint a small area of the bubble wrap just only one side after that take that bubble wrap from the other side where it is not painted now pat the bubble wrap the side having the paint red color on that cutout sheet of the shape of an apple. After we have printed the bubble wrap prints on the Apple cut out now cut out the leaf from the green sheet and the steam from the brown sheet.
Look your bubble wrap Apple is ready!
Read More: Christmas Riddles for Kids – Holiday Brain Workout
Thread Apple Craft Ideas
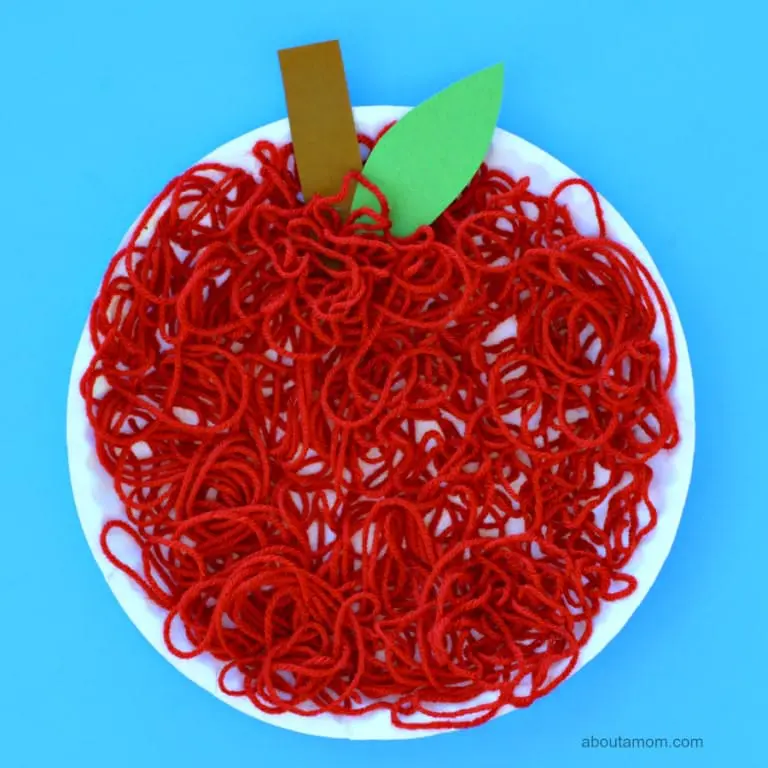
Things required:
- Thread or yarn of red color
- Paper plate
- Brown sheet
- Green sheet
- Scissors
- Glue
Firstly take the paper plate and glue it up nicely now take the thread or yarn and stick it all over the plate where it is glued up as shown in the picture below. Cover the paper plate as much as possible so that no white gaps can be seen and after that cut out the leaf shape from the green sheet and the stem from the brown sheet and stick them as shown. Your Apple craft is ready your children would love to make as they are very easy and very inexpensive.
Pom-Pom Apple
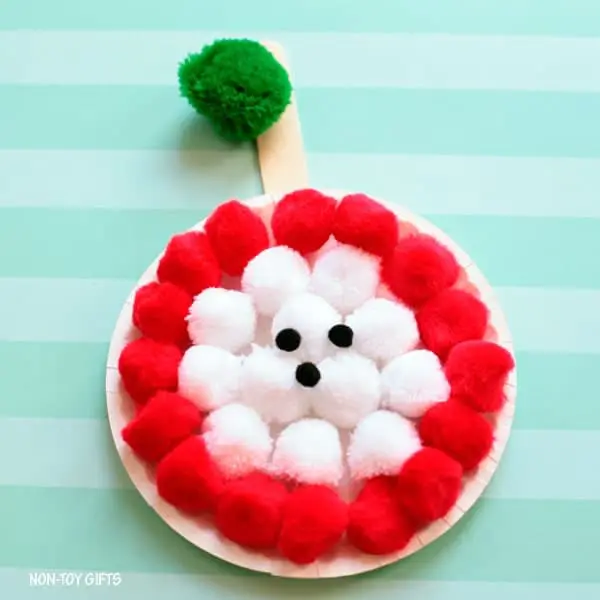
Image Source/Tutorial: Non-Toy Gifts
Things Required:
- Red pompom
- Green pompom
- White pompom
- Ice cream stick
- Glue
- Marker
Stick the pom poms on the white sheet which is cut in a circular shape as shown in the picture. Now stick the white pom as shown and after that stick, the ice cream stick at the back for the leaf at the top of the stick, stick a green pom, and for seeds mark it with a black marker. So here your pom Apple is ready.
Please visit our website for more interesting craft ideas.
And Leave your lovely comments to let us know what ideas you want us to make an article on. Your opinion matters.
Readers inspire us to write more and dog the information out so it feels great when you show us your love through your comments.
You may like these:
Simple Fruit-Themed Craft Activities for Children
Inspire kids to create fun and colorful fruit-themed crafts, combining creativity with learning about healthy foods through hands-on and enjoyable projects.
Spring-Themed Craft Ideas and Activities for Children
Welcome the season with vibrant spring crafts, providing kids with fun and educational activities that celebrate nature’s renewal and creativity.
Winter-Themed Craft Projects for Kids and Adults
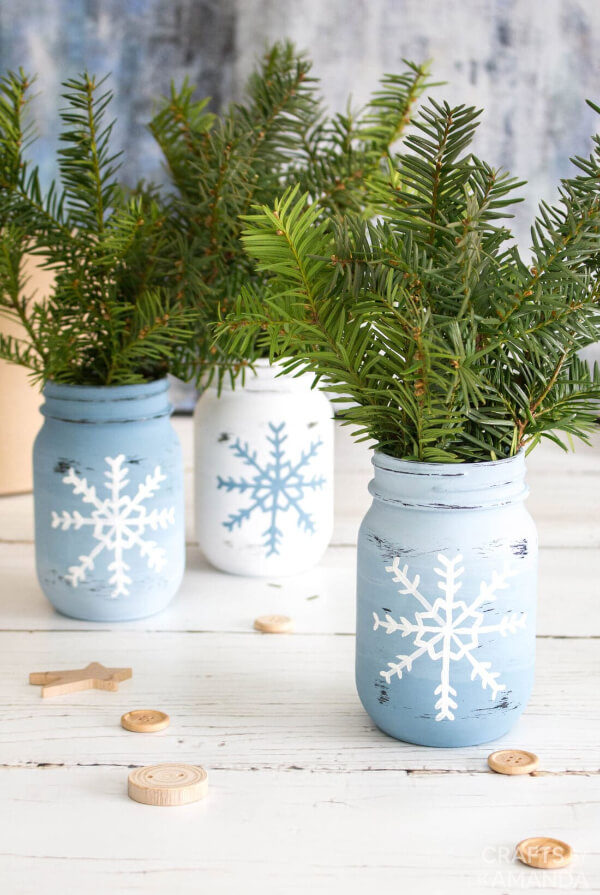
Celebrate the season with collaborative winter crafts, offering creative and engaging activities for all ages to enjoy together during the colder months.
Snowman-Inspired Craft Ideas for Kids – Creative and Straightforward Concepts
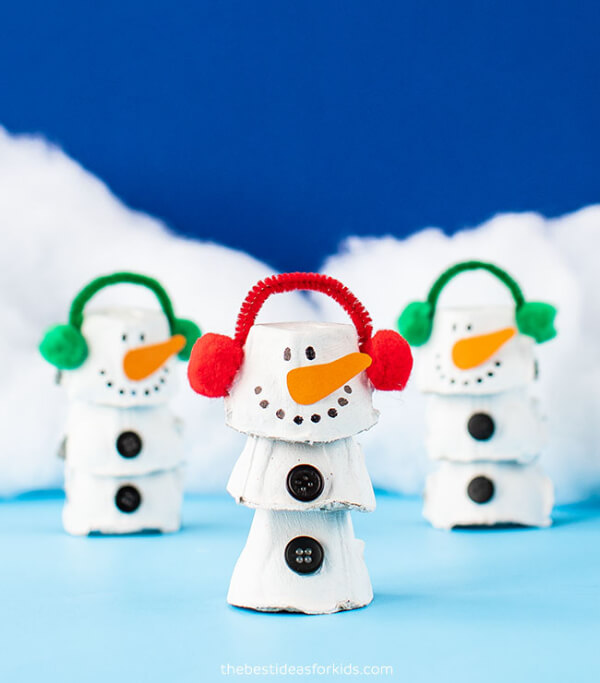
Engage children in festive snowman crafts, providing creative and easy projects that celebrate winter and inspire imaginative play.
Detective-Themed Party Decoration Concepts for Enthusiasts of Mystery
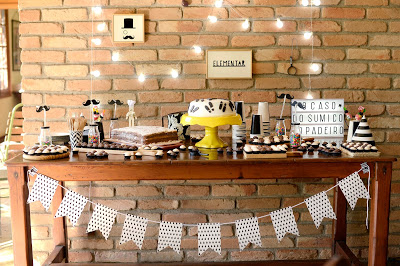
Create an immersive mystery experience with detective-themed party decorations, perfect for engaging mystery lovers and setting the stage for an unforgettable celebration.