
This article has been specially written for craft lovers. If you have been assigned some project related to DIY Christmas preparations, then continue reading it further. This will surely help you. Just a few days are left for Christmas and preparations start early.
We have a lot of time to make these cute little things from the simple things around us. Don’t waste your time by moving here and there, instead spend some time making your DIY decors.
Contents
- Simple Christmas Decorations
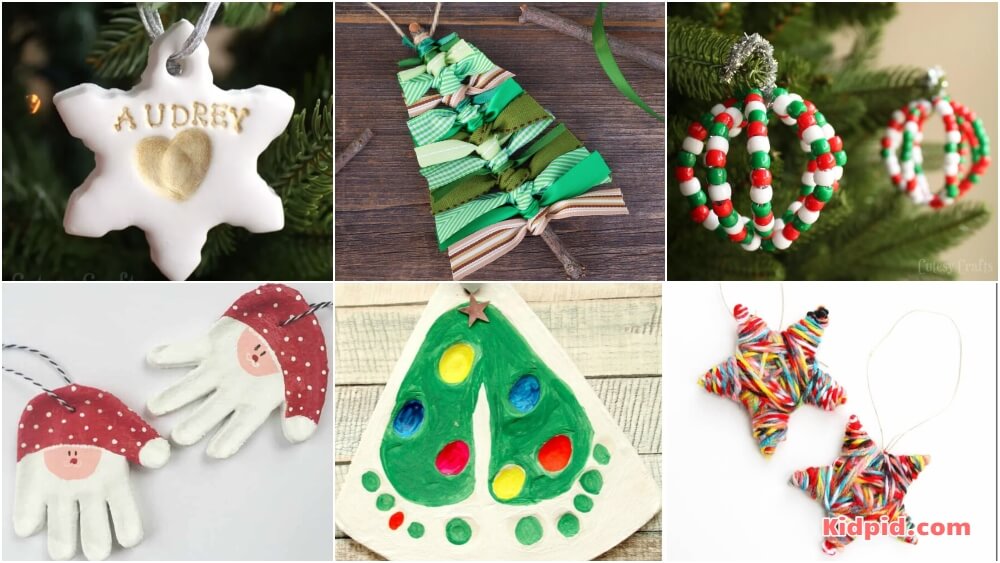
- 1. Foot Print Wall Hanging
- Materials required:
- 2. The Cute Ribbon X-mas Tree
- Materials required:
- 3. Multi-Colour Bead Balls
- Materials required:
- 4. Glitter Balls
- Materials required:
- 5. Snow Santa Hands
- Materials required:
- 6. Name Hangings
- Materials required:
- 7. Snow Clayey Stars
- Materials required:
- 8. Multi-Coloured Stars
- Materials required:
- 9. Yarn Stars
- Materials required:
- 10. Bling Cones
- Materials required:
- Washi Tape Trees
- Materials required:
- You may like these:
Simple Christmas Decorations
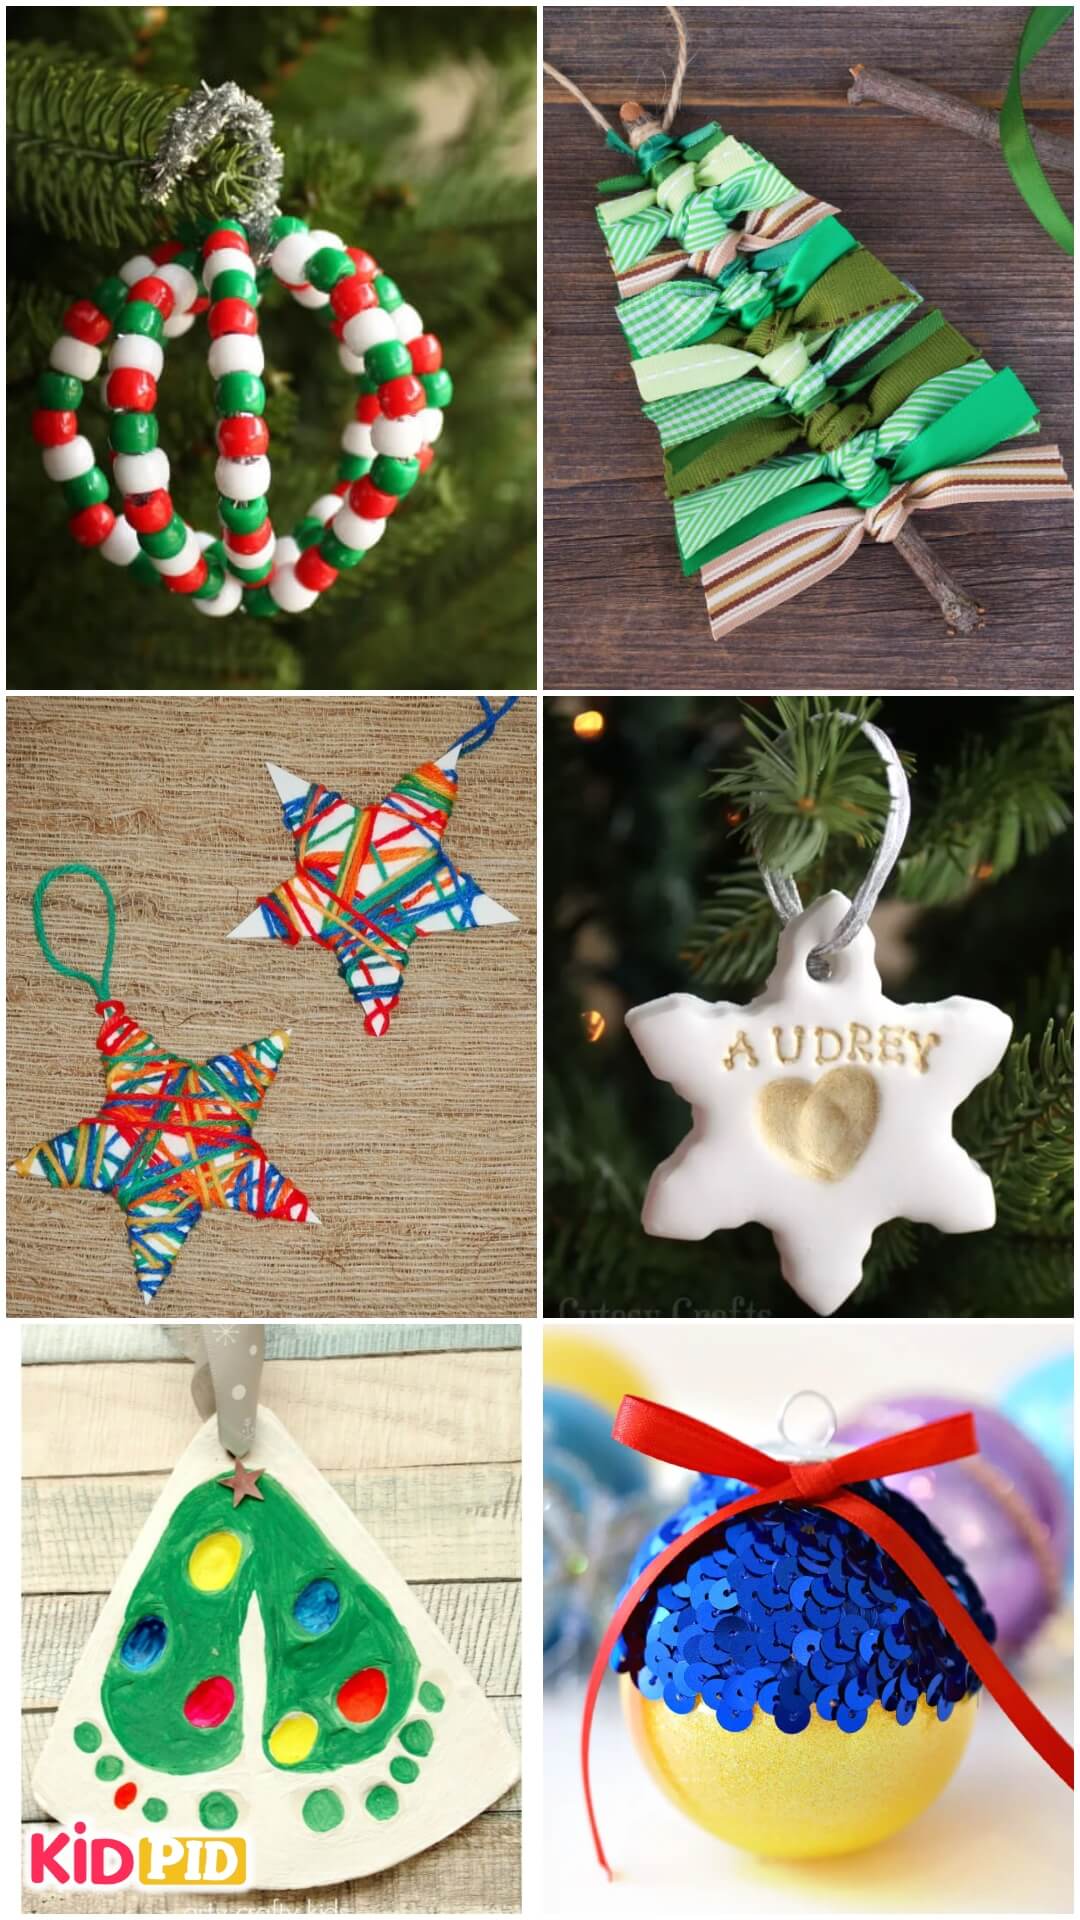
1. Foot Print Wall Hanging
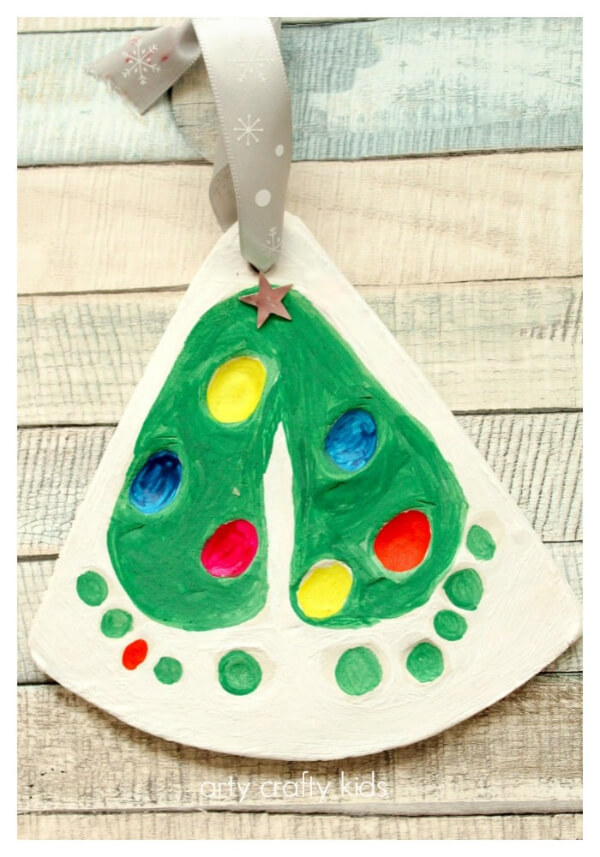
Image Source/Tutorial: arty crafty kids
Materials required:
- Clay
- Paintbrushes
- Paint
- Ribbon.
Suitable age: 7-14 years
Take the clay and shape it into a triangle. Now with the help of paintbrushes (backside of the brush) create some holes so that the foot impressions of the baby are formed. Now fill the holes by colouring them with paint. Holes depict the toes. Hang it on the wall or Christmas tree with the help of a ribbon that had been placed at the top of the triangle.
2. The Cute Ribbon X-mas Tree
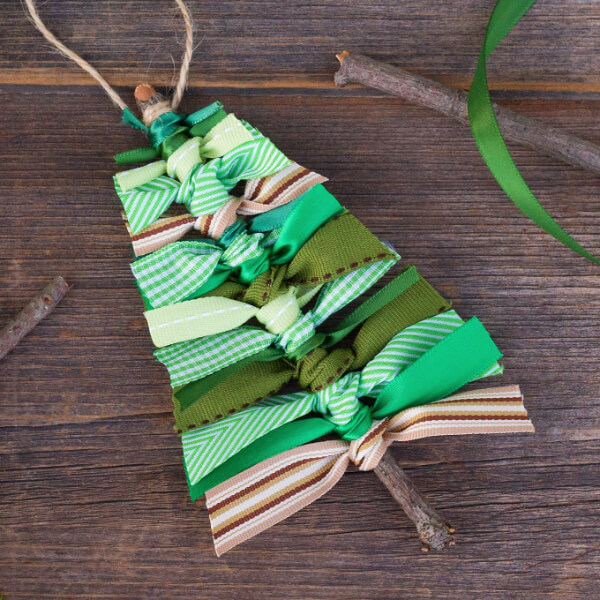
Image Source/Tutorial: fireflies and mudpies
Materials required:
- Ribbons
- Twigs
- Scissors.
Suitable age: 5-13 years
Collect some twigs. Take the ribbons of equal length and just knot them over the twigs one after the other as shown in the picture. Now take the scissors and cut the ends of the ribbon from both sides so that a triangular shape is formed. The triangular shape depicts the shape of the Christmas tree.
3. Multi-Colour Bead Balls
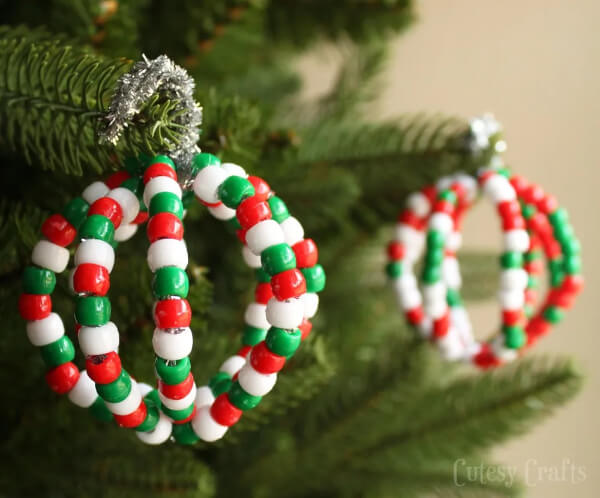
Image Source/Tutorial: cutesy crafts
Materials required:
- Metallic wire
- Pliers
- Beads of different colour
- Ribbons
Suitable age: 9-14 years
Take the Metallic wires and bend them in the semi-circle form. Pass the multiple Coloured beads through the metallic wires. Join all such semi-circles together using pliers by twisting all the semi-circular wires together at one spot. Just tie the ribbon at this point so that we can hang it on the sides of the tree.
4. Glitter Balls

Image Source/Tutorial: as the bunny hops
Materials required:
- Plastic ball-shaped ornaments
- Baby oil
- Glitter powder
- Ribbons.
Suitable age: 8-14 years.
Take the empty plastic ornament that has some lid to open it. Now pour some baby oil into it so that a sticky surface has been formed. Now add some glitter powder to it such that glitter starts shining and moving with the oil. Close the lid and rotate this Ball full of glitter now. To beautify it more, we can stick ribbons from the outside.
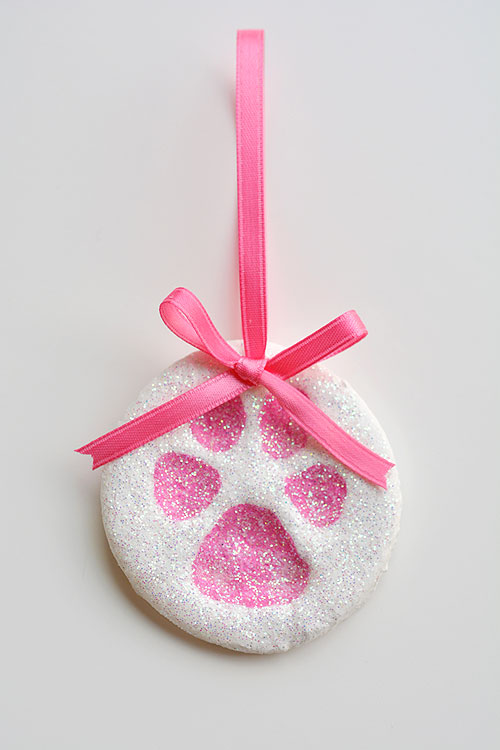
5. Snow Santa Hands
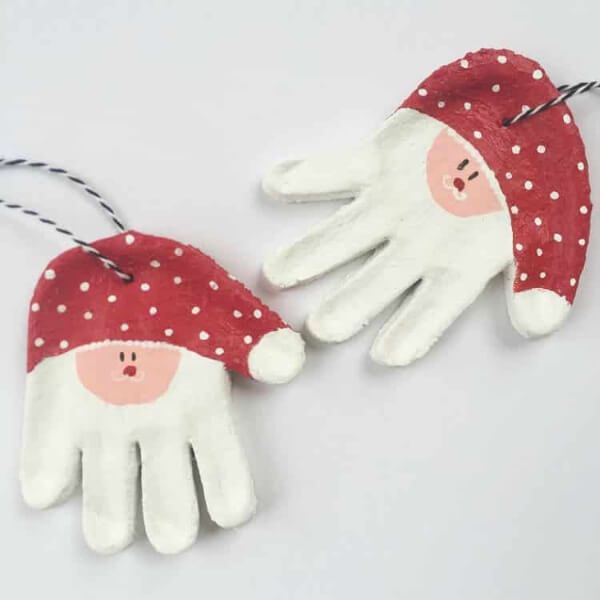
Image Source/Tutorial: momma society
Materials required:
- Flour
- Salt
- Oven
- Colours
- Thread
- Knife.
Suitable age: 9-14 years.
Take the flour and salt, and make a dough out of it by kneading it for 5-6 mins. Now get your kid and put his / her hand into the dough such that the impression of the hand is made. Now with the help of the knife cut the outline. Place this flour hand impression into the preheated oven for some time.
After some time get the hand impression out, and start colouring it with the desired colours as shown in the picture. Create a small hole at the top using a knife and pass a thread through it, to hang it wherever you want to.
6. Name Hangings
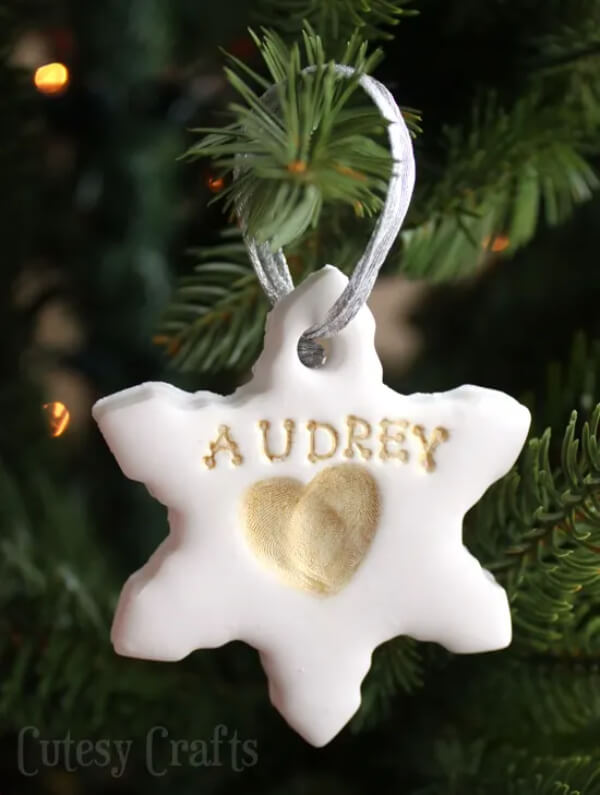
Image Source/Tutorial: cutesy crafts
Materials required:
- Polymer clay
- Metallic paint
- Straw
- Old rubber alphabetical stamp
- Brushes
- Ribbons
- Knife.
Suitable age: 7-14 years
Take the polymer clays and start kneading them so that the dough is created. Now take this dough and with the help of a knife, cut it, in the desired shape. With the help of a straw, make a hole at the top. Get the old rubber stamps and engrave the name of your kid at the top. Now, bring your kid and guide him/her to press her fingers into the dough so that the heart shape is created in the centre.
Now take the metallic paint and fill the letters of the name and heart with colour. Let the dough settle. Once the clay polymerizes, pass the thread through the hole to hang it at the desired place.
7. Snow Clayey Stars
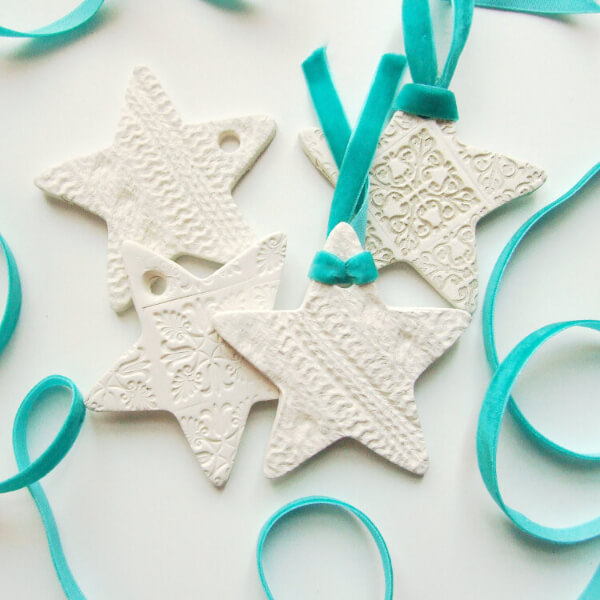
Image Source/Tutorial: gathering beauty
Materials required:
- Hard air dry clay
- Knife
- Wheels of the toy cars
- Velvet ribbons
- Straw.
Suitable age: 7-14 years
Take the hard air dry clay, and make a dough of it. Now with the help of a knife, cut the star shape out of it. Take the toy car, and start moving it over the clay so that the Tire impressions are engraved on the star which will give it more detailing. Now make a hole by pressing straw at the top of the star. Take the velvet ribbon and pass it through the hole so that we can hang it.
8. Multi-Coloured Stars
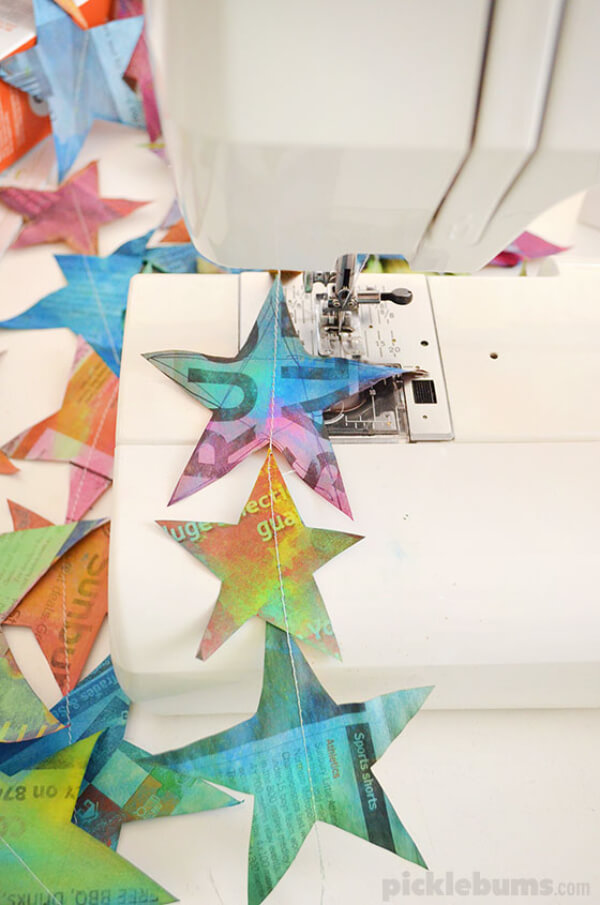
Image Source/Tutorial: pickle bums
Materials required:
- Old newspapers
- Colours
- Brushes
- Scissors
- A sewing machine.
Suitable age: 8-14 years
Take the old newspapers and cut them into star shapes using scissors. With the help of paintbrushes, start, colouring them one by one. Let them dry in the sunshine. Once the stars have dried, collect them and start stitching them one after another in a straight line using a sewing machine. Our funky stars are ready.
9. Yarn Stars
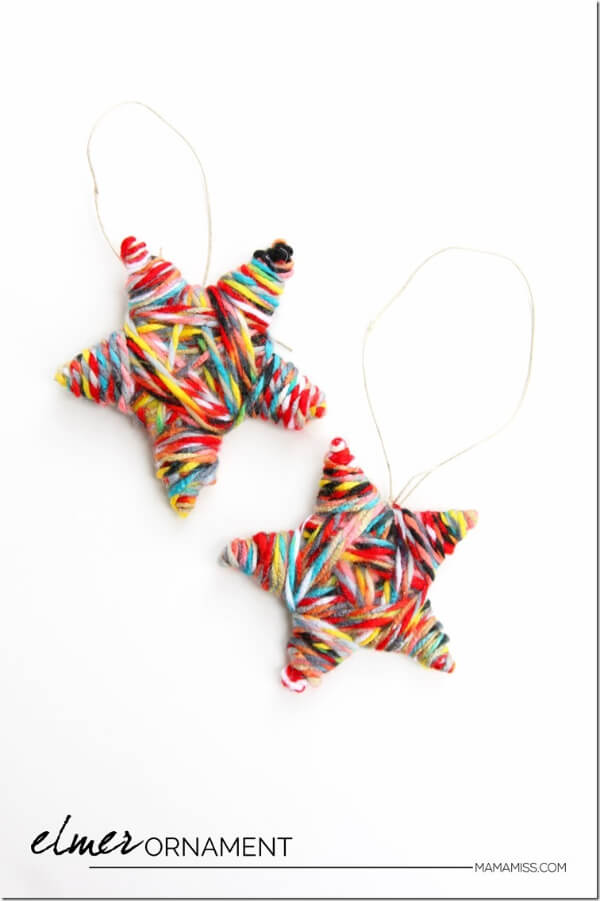
Image Source/Tutorial: mama miss
Materials required:
- Cardboard sheet
- Scissors
- Multi-coloured yarn.
Suitable age: 7-14 years
Take the cardboard sheet and cut it, in a star shape. Now take the multi – Coloured yarn and start covering the cardboard star with the yarn, by wrapping the yarn over the star. Continue this until the whole cardboard has been covered with yarn and you’re done!
10. Bling Cones
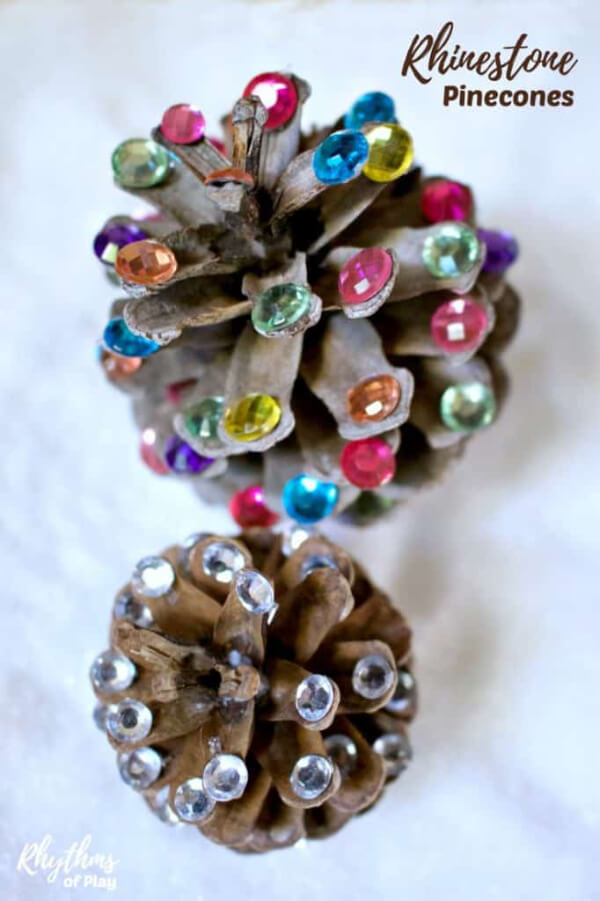
Image Source/Tutorial: rhythms of play
Materials required:
- Pine-cone
- Beads
- Superglue.
Suitable age: 7-14 years.
Collect some pine cones from the wood. Take the cones and paste the beads between the scales of the cone using super glue. Now the boring cones look shiny and blinking all around.
Washi Tape Trees
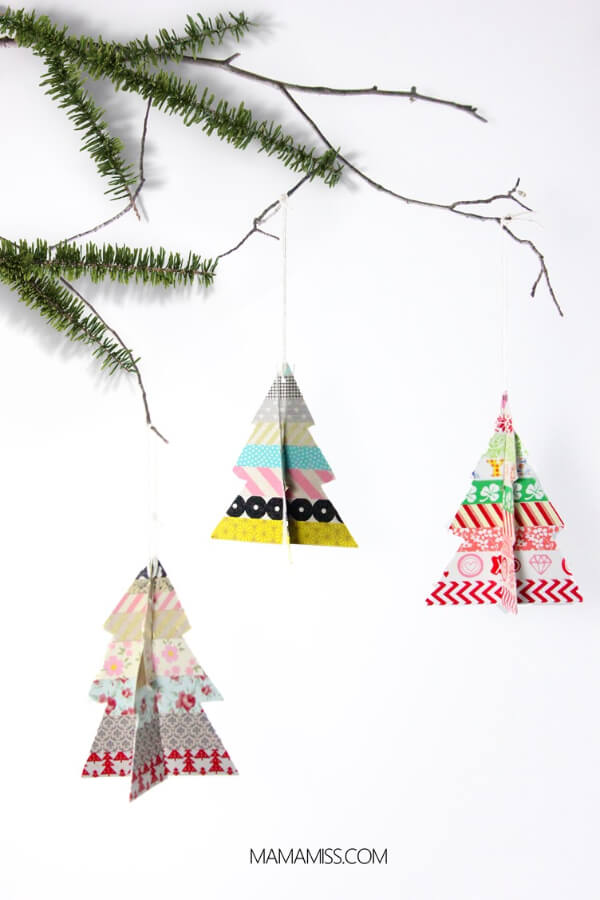
Image Source/Tutorial: mamamiss
Materials required:
- scissors
- assorted washi tape
- white cardstock
- twine
- hole punch
- template
Suitable age: 7-14 years.
Print out the template then cut it out. Tape up the trees in rows, in coordinating tape. Tape each side, one side at a time, trimming the tape as you go. Once all 4 sides are taped up, cut a slit down the top of one tree, and a slit up the bottom of the other. Punch a hole in the top of the tree that has the slit on the bottom. String the twine and loop it. Intersect the two trees.
This was all for today, try out these smart activities at home. They are too simple and less time-consuming. All you need is a few pieces of stuff, and you can create wonderful things to decorate your homes. Create unforgettable memories with your kids, and have fun while performing all the above DIY activities. Our site is full of such amazing DIY articles, do visit us daily. Don’t forget to give us feedback.
You may like these:
DIY Concepts for Christmas Celebrations

Explore creative and festive DIY projects to enhance your Christmas celebrations. Engage with family and friends through crafting, making lasting memories while adding a personal touch to your holiday decor.
Simple Christmas DIY Crafts for the Holiday Season
Discover easy and enjoyable DIY crafts perfect for the holiday season. These projects offer a fun way to express creativity, making your home festive and inviting for family gatherings.
Handcrafted Christmas Ornaments
Create beautiful handcrafted ornaments to adorn your Christmas tree. Personalize each piece with unique designs and materials, transforming your holiday decor into a meaningful reflection of your style and creativity.
Ideas for Christmas Salt Dough Keepsake Ornaments
Craft memorable salt dough ornaments this Christmas season. These keepsakes are easy to make, allowing you to preserve precious moments and create thoughtful gifts for loved ones to cherish.
Christmas Crafts for Children to Create at Home
Engage children in festive creativity with fun Christmas crafts. These projects foster imaginative expression, enhance fine motor skills, and provide delightful keepsakes to celebrate the joy of the holiday season.


